Cloudflare integration
How to integrate Nametag with Cloudflare Zero Trust.
Cloudflare Zero Trust provides granular, least-privilege access to internal applications, infrastructure, and AI agents. Access control is provided by delegating to an OpenID Connect (OIDC) identity provider.
When you use Nametag with Cloudflare Zero Trust, Nametag will verify the identity of the user against an existing account in one of the connected directories. The process is:
- A user attempts to access an application protected by Cloudflare Access.
- Cloudflare redirects the user to Nametag for authentication via OIDC.
- Nametag prompts the user for their email address.
- Nametag prompts the user to verify their identity using a government-issued ID and biometric verification.
- Nametag checks a connected directory to confirm that the email address belongs to the verified individual.
- Nametag completes the OIDC flow, issuing an
id_tokenand redirecting the user back to Cloudflare. - Cloudflare grants or denies access to the application based on the user’s identity and the configured access policies.
- Cloudflare passes the request to your application along with authentication information.
identity
verification")<-- "account
binding" --> Directory("Directory
(e.g. Okta,
Entra ID)") Cloudflare --> A("Your Application")
Prerequisites
You will need:
- A Nametag account with administrator access.
- A directory (e.g. Okta or Entra ID) connected to Nametag.
- A Cloudflare Zero Trust account with an active subscription.
- An application protected by Cloudflare Access.
- Administrator access to configure identity providers in Cloudflare.
Collect Cloudflare information
Sign in to the Cloudflare Dashboard and locate your *ZERO_TRUST_TEAM_NAME* from the main page of the console.
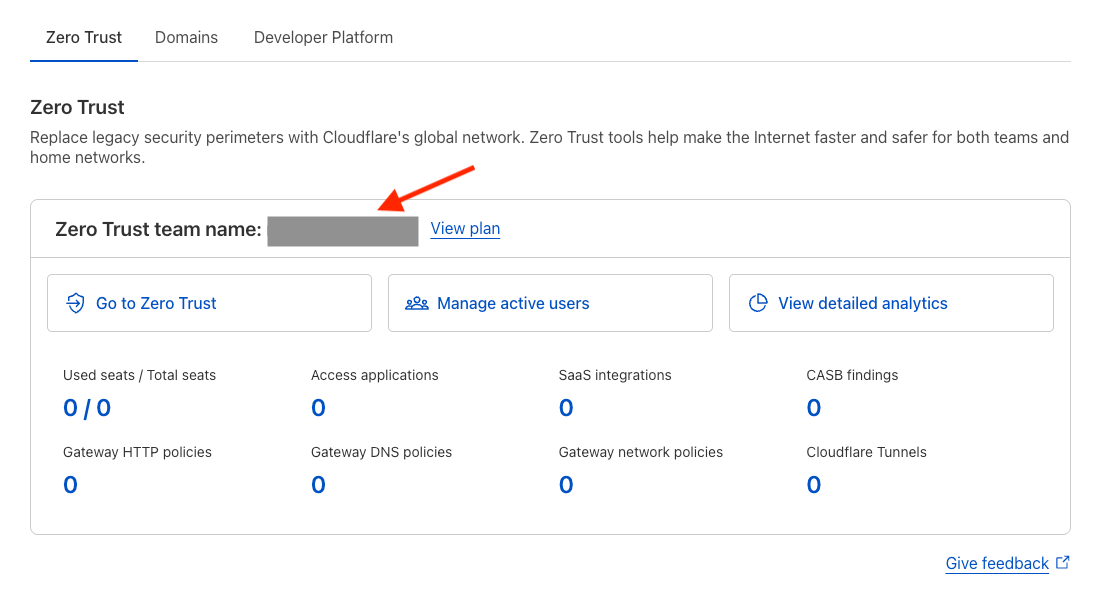
Save this value for the next step.
Configure Nametag
Find directory ID
From the Nametag Console go to Configure > Integrations and select the applicable directory.

Find Directory Information and save the *DIRECTORY_ID* for the next step.

Create OAuth credentials
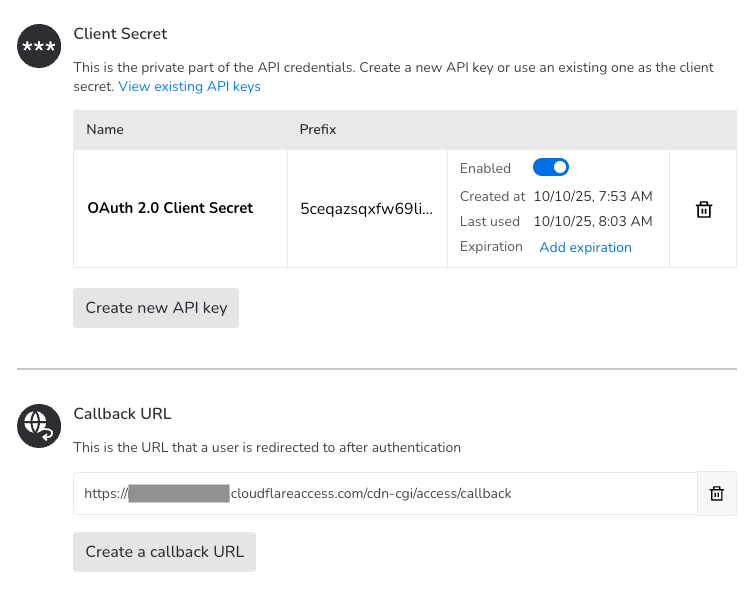
From the OAuth tab, find Client Secret and choose Create new API key. Save the *CLIENT_SECRET* for the next step.
Select Create a callback URL and enter your Cloudflare Access callback URL:
https://*ZERO_TRUST_TEAM_NAME*.cloudflareaccess.com/cdn-cgi/access/callback
Configure Cloudflare
- Sign in to the Cloudflare Dashboard
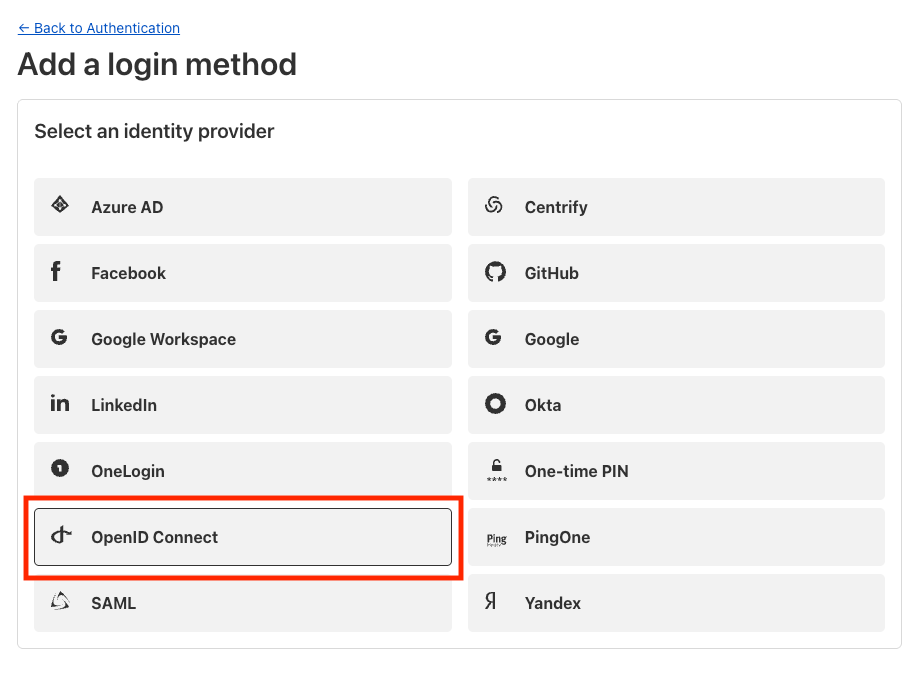
- Go to Zero Trust > Settings > Authentication > Login methods and choose Add new.
- Choose OpenID Connect
Provide the following values:
Name: : Nametag
App ID:
: *DIRECTORY_ID*
Client Secret:
: *CLIENT_SECRET*
Auth URL:
: https://nametag.co/oauth2/authorize
Token URL:
: https://nametag.co/oauth2/token
Certificate URL:
: https://nametag.co/.well-known/jwks
Proof Key for Code Exchange (PKCE): : Off
Enable SCIM: : Off
Email Claim (optional):
: email
OIDC Claims (optional):
: name
: (You can optionally add additional claims according to your needs.)
OIDC Scopes (optional):
: openid
: email
: profile

Select Save to apply the configuration.
Test the connection
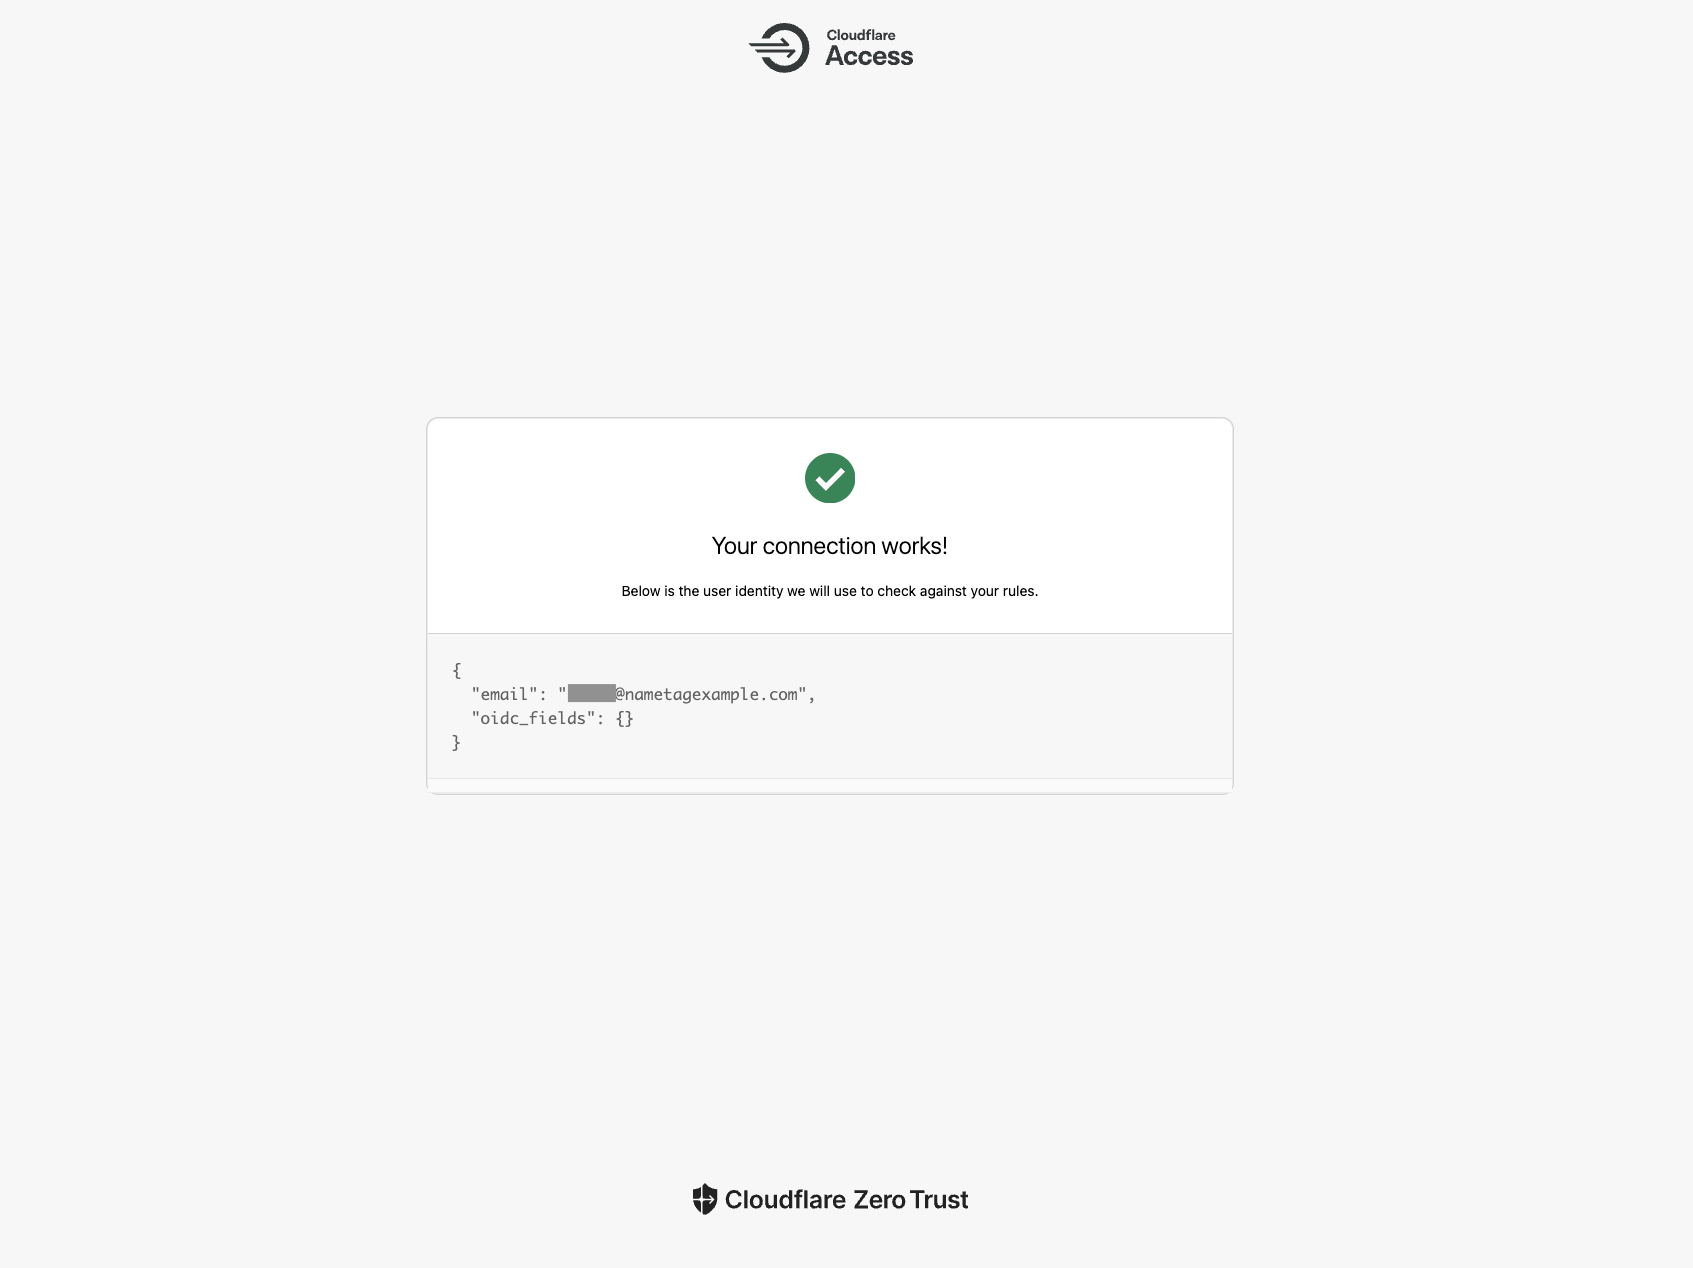
Press Test to verify the connection.
When prompted, enter the email address associated with your Nametag directory.
Scan the QR code and verify your identity with Nametag.
If all goes well, Cloudflare shows a confirmation screen: