Okta External Authentication Method
How to set up Nametag as an external MFA provider for Okta
Introduction
Nametag can be used as an Okta IDP authenticator. This guide will walk you through the steps to set up Nametag as an MFA provider for your Okta tenant.
Prerequisites
Before you begin, you will need the following:
- An active Okta tenant on the Identity Engine with Admin permission.
- A Nametag account with an active subscription and Admin permission.
Create an Okta directory
If you don’t already have an Okta integration configured in Nametag, you’ll need to establish one.
- Sign in to the Nametag console
- Go to Configure > Integrations.
- Select New integration and choose Okta.
- Follow the instructions to set up your Okta directory in Nametag.
Configure authentication policy in Nametag
- Go to Configure > Integrations and select the directory you want to configure.
- In the External authentication method rules section, choose a policy for account binding. For more information about configuring binding policies see this document.
- Note the Client ID and Client Secret for the directory you just configured. You will need this value when setting up the external authentication method in the Okta External IDP.
Create an external factor IDP in Okta
-
Sign in to your Okta tenant.
-
Go to Security > Identity Providers.
-
Select Add identity provider.
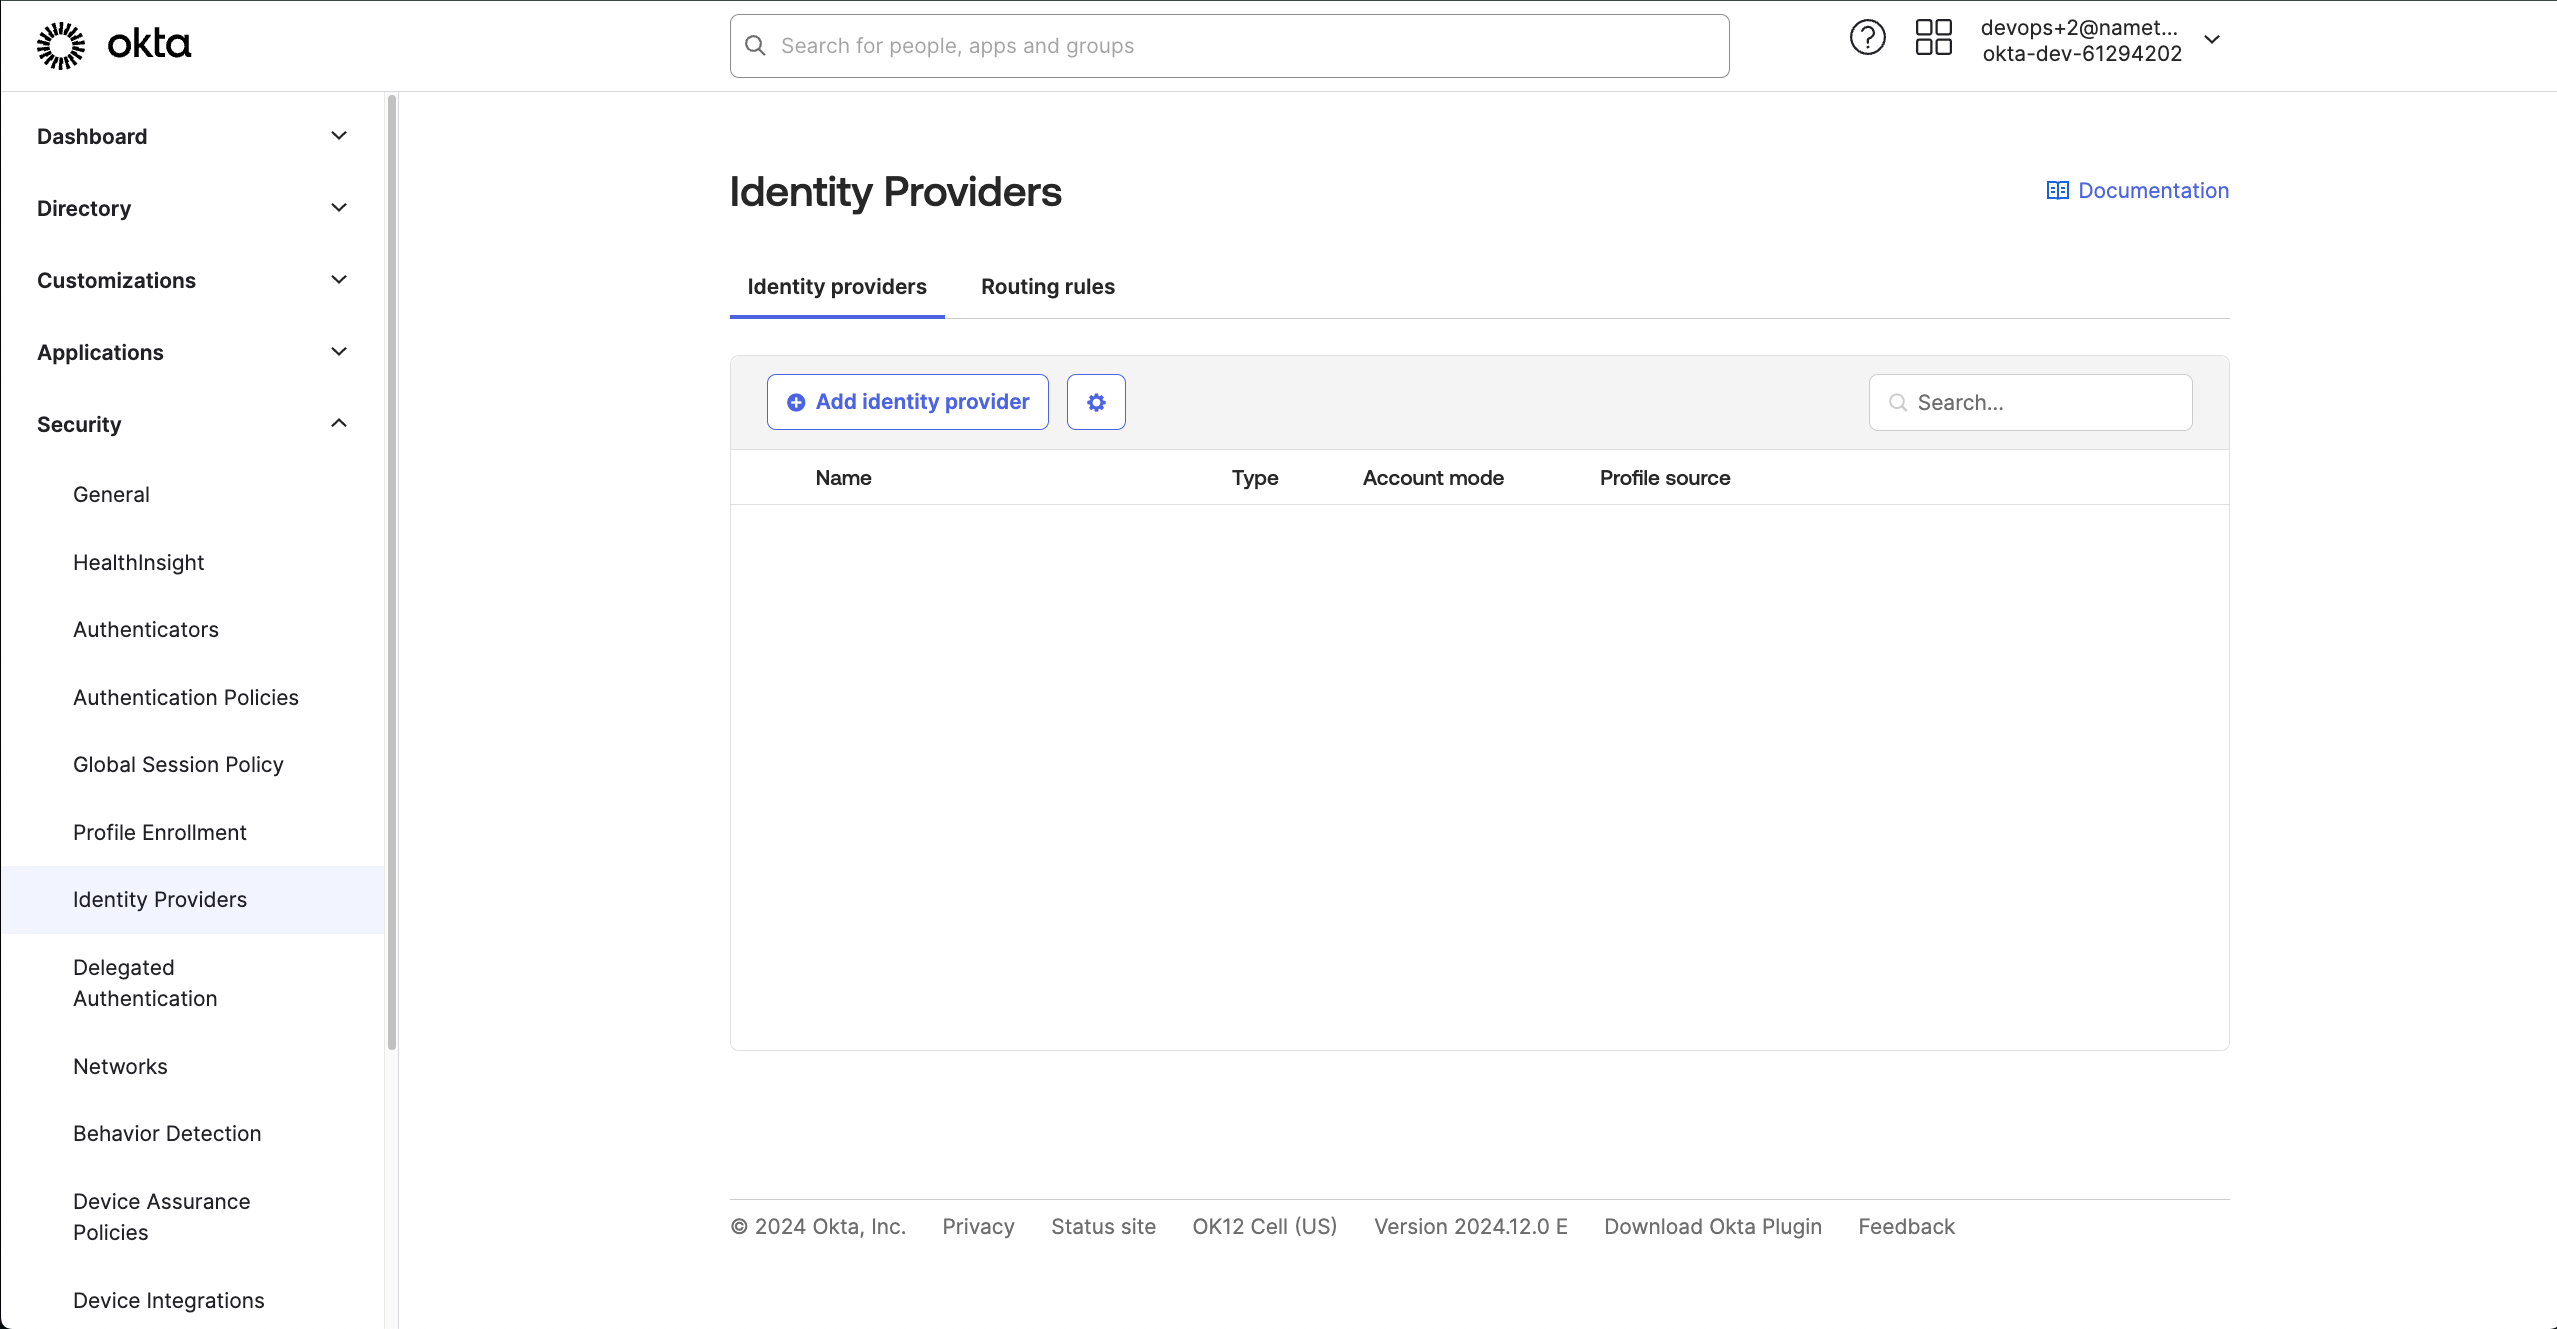
Add identity provider -
Choose OpenID Connect IDP as the Identity Provider and select next.
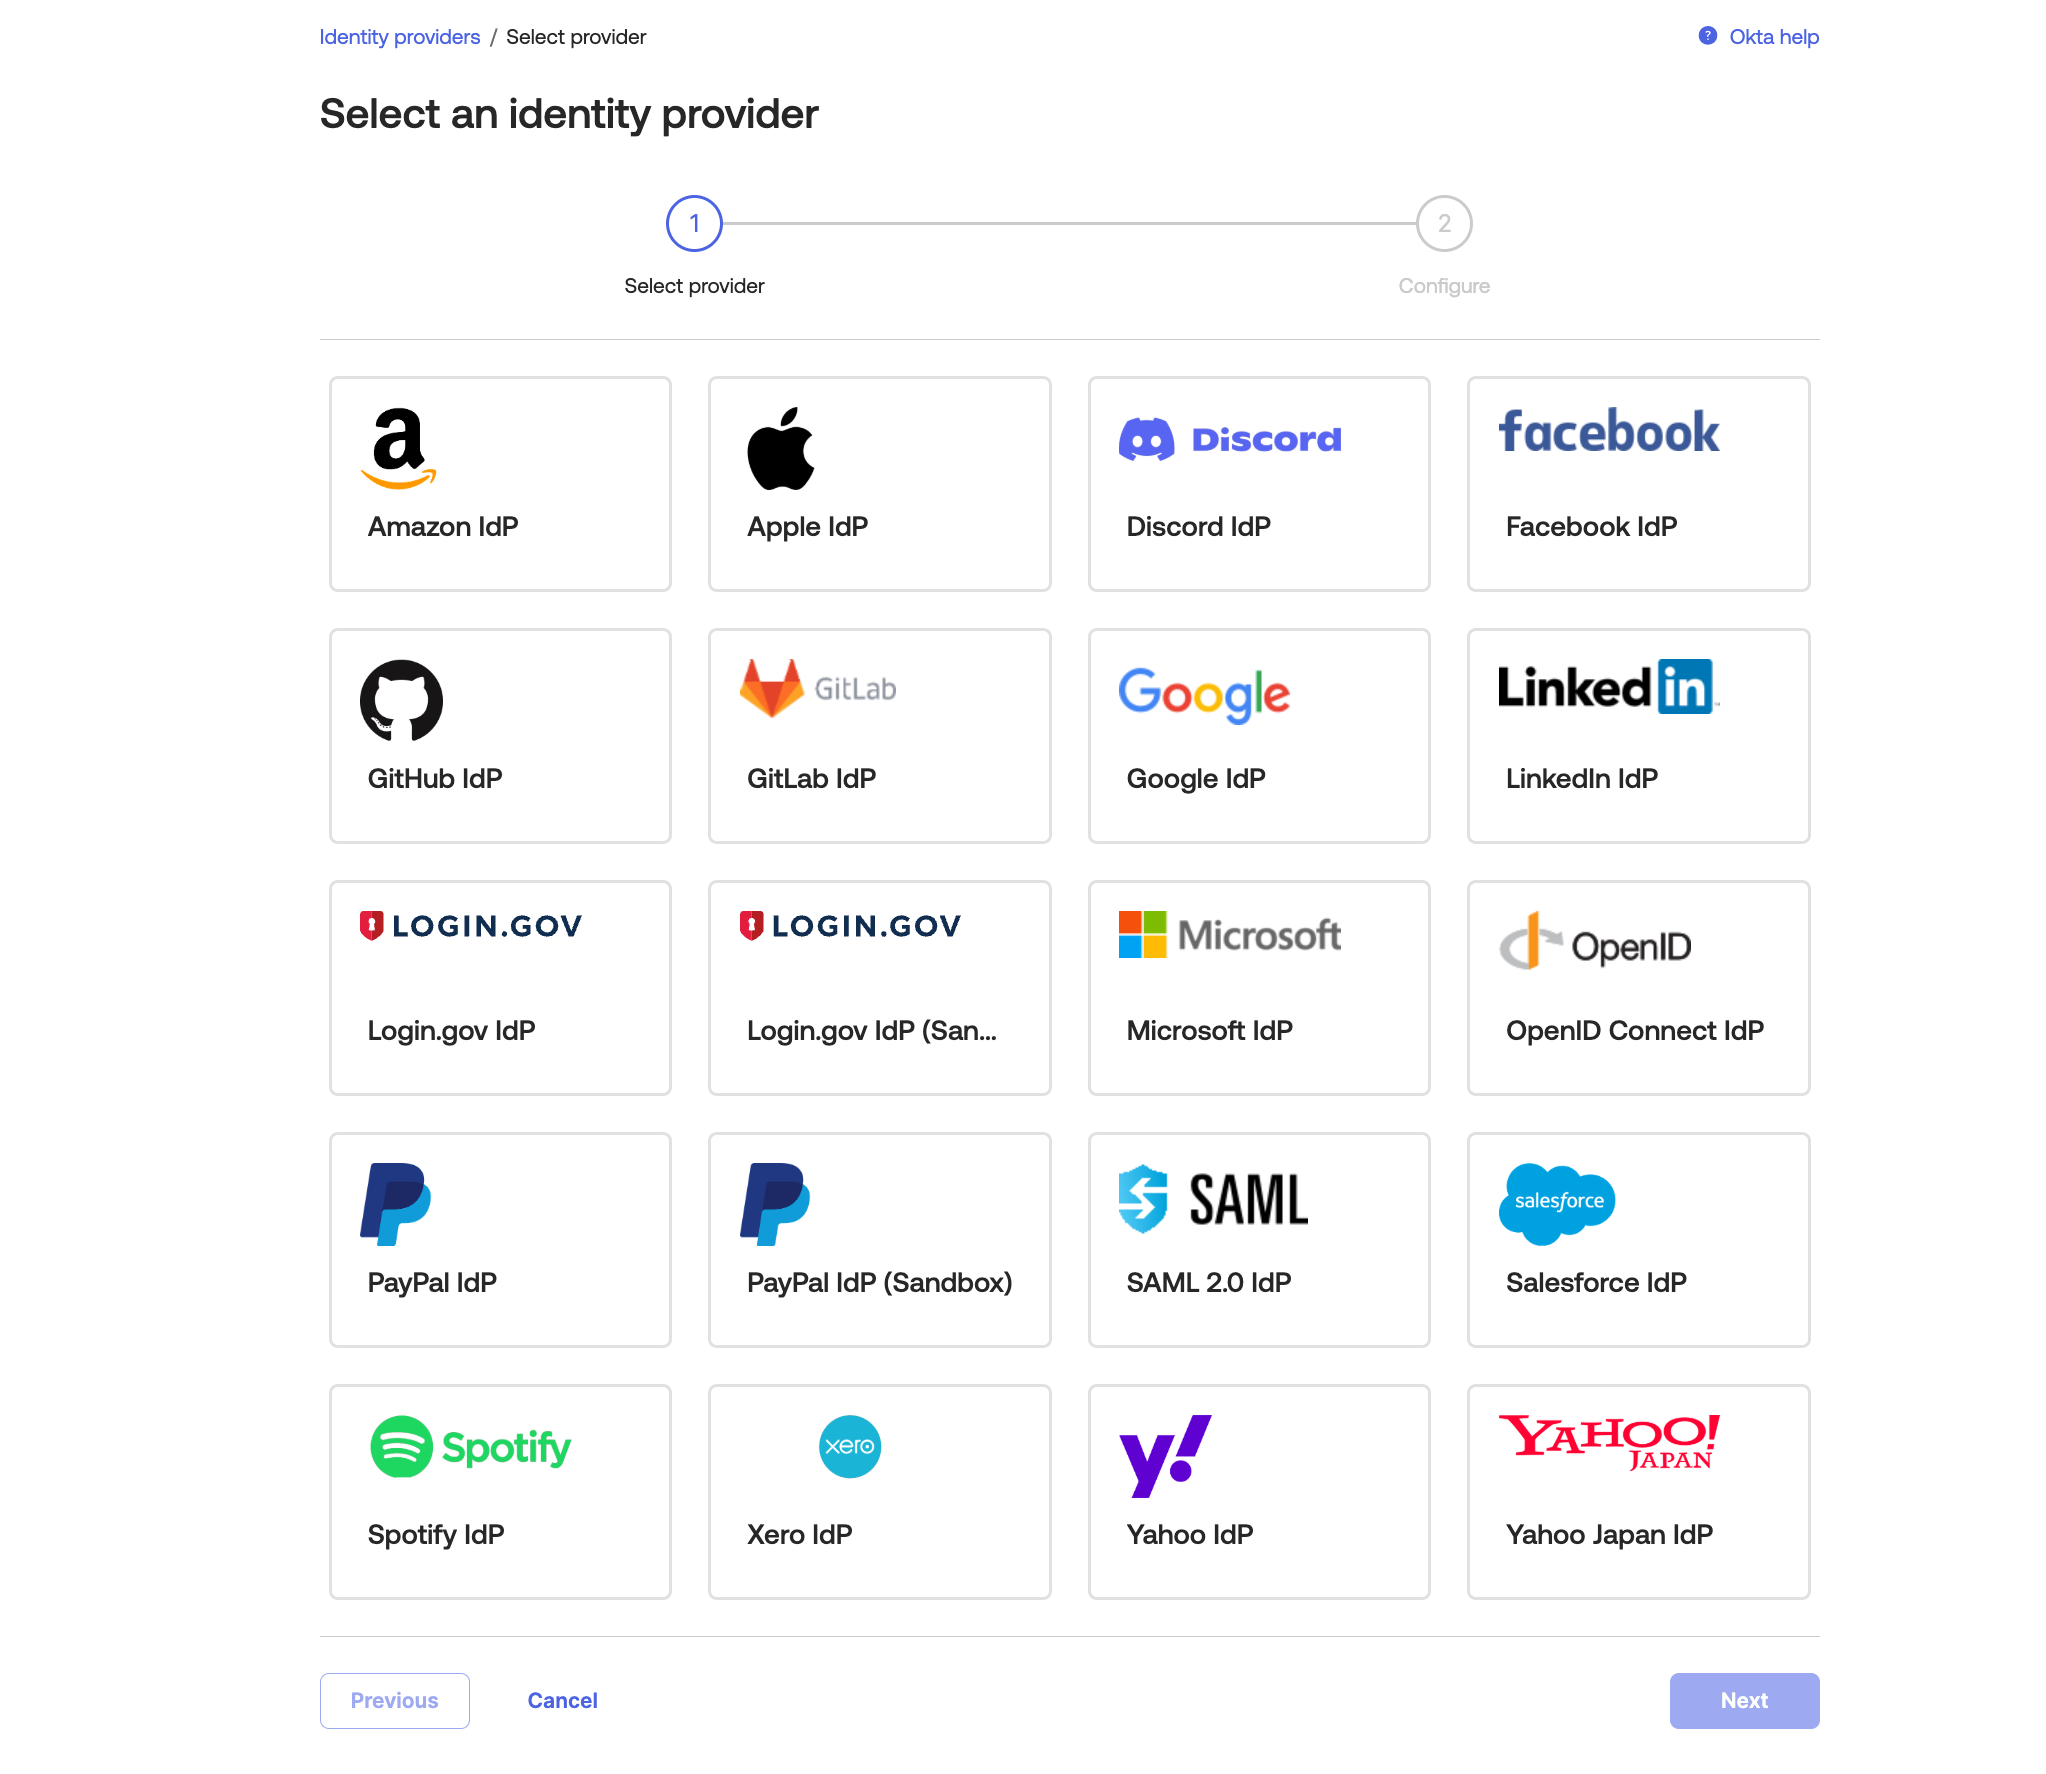
Select identity provider -
Provide the following information:
- Name
Nametag- IDP Usage
Factor- Scopes
openid only- Client ID
*CLIENT_ID*(from the previous step)- Client Secret
*CLIENT_SECRET*(from the previous step)- Issuer
https://nametag.co/okta/eam- Authorization endpoint
https://nametag.co/okta/eam/authorize- Token endpoint
https://nametag.co/okta/eam/token- JWKS endpoint
https://nametag.co/okta/eam/jwksUserinfoendpointhttps://nametag.co/okta/eam/userinfo
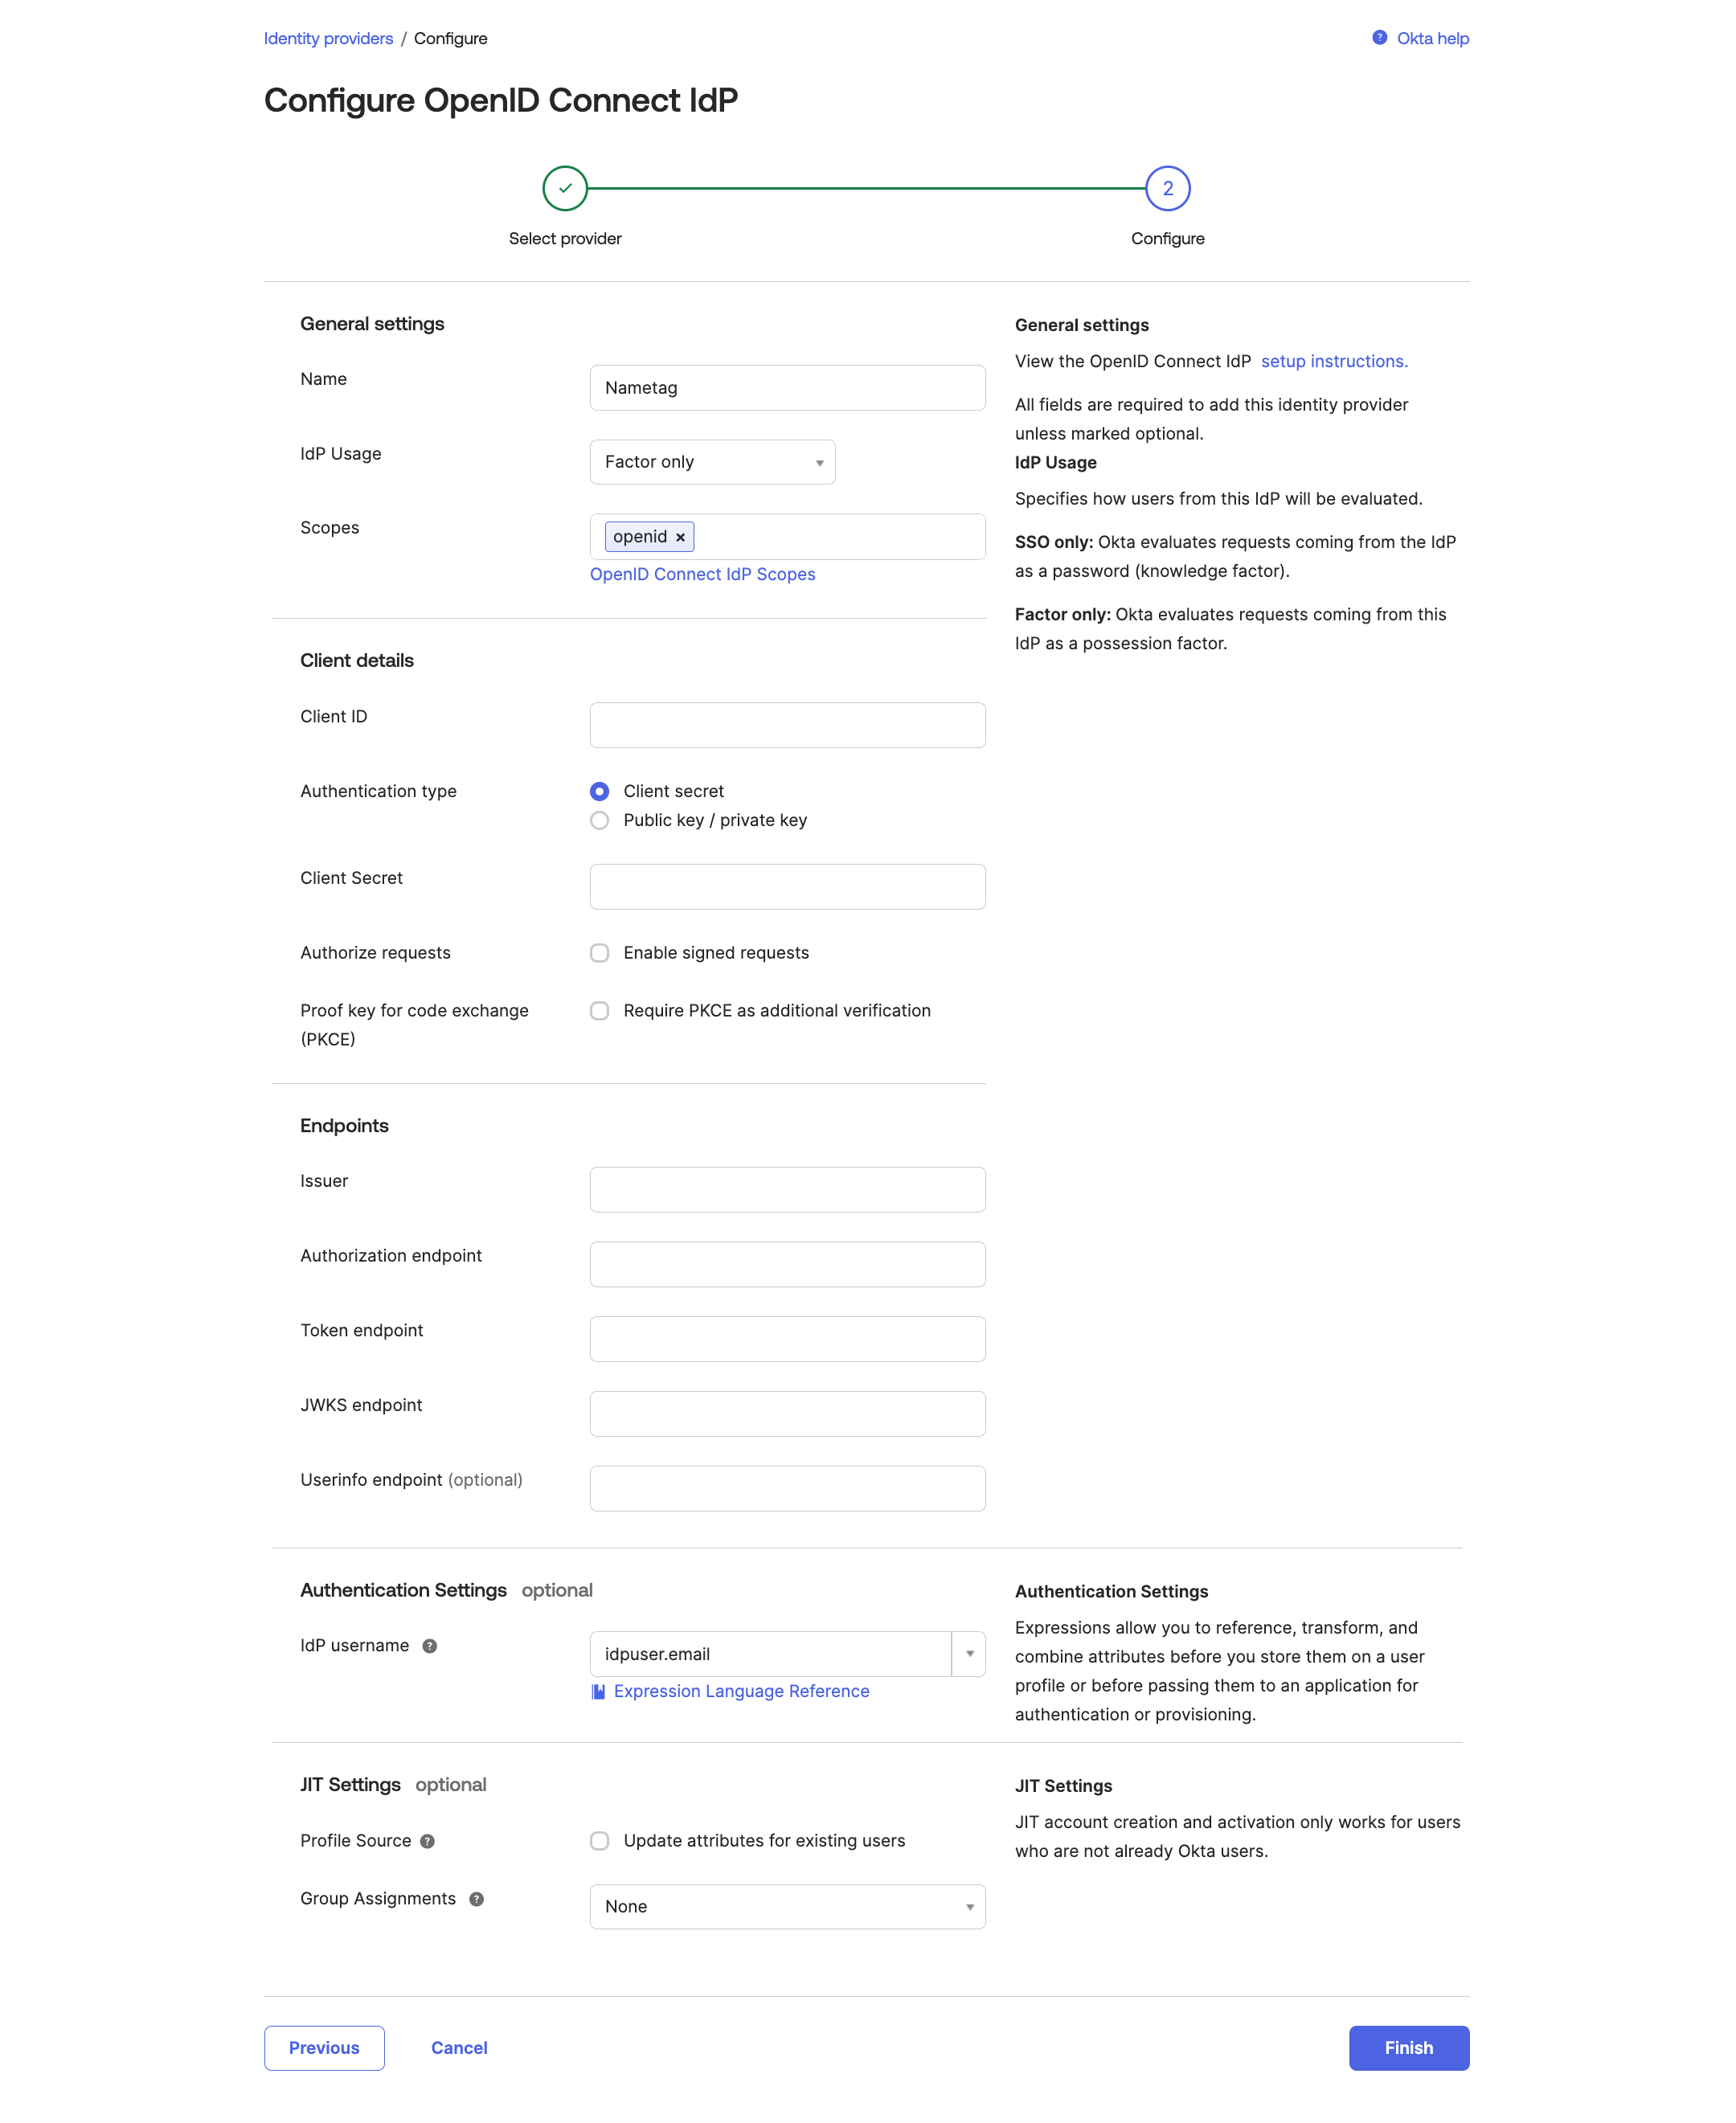
Configure OpenID Connect IDP -
Select Finish to create the IDP.
-
Go to Security > Authenticators and select Add Authenticator. Then from the types of authenticators to add, select IDP Authenticator.
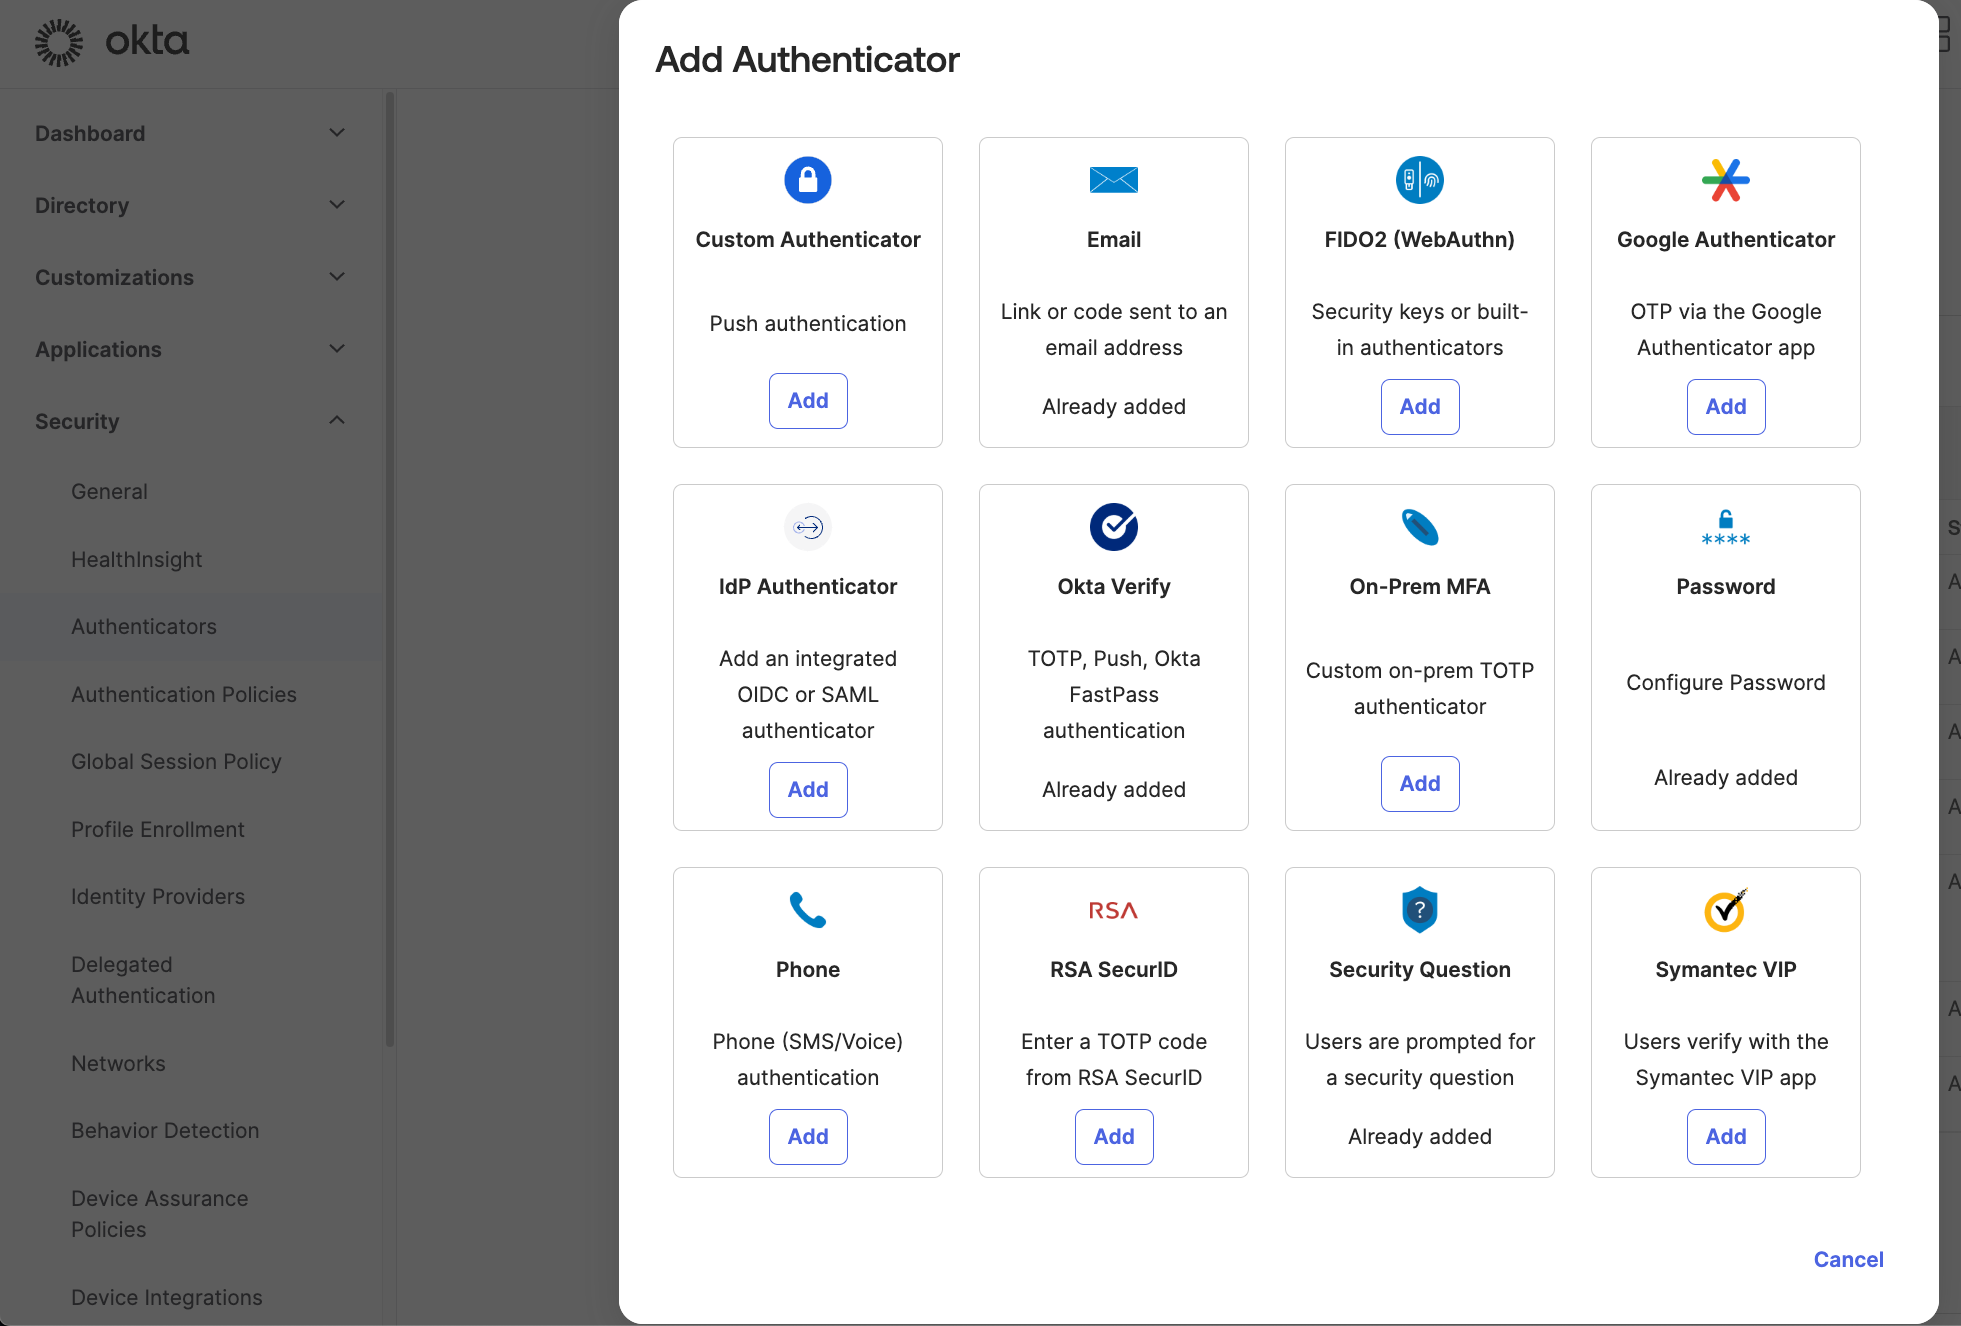
Add authenticator -
In the Identity Provider drop down in settings, choose the IDP you just configured previously. Give it an authenticator name and branding. Select Add.
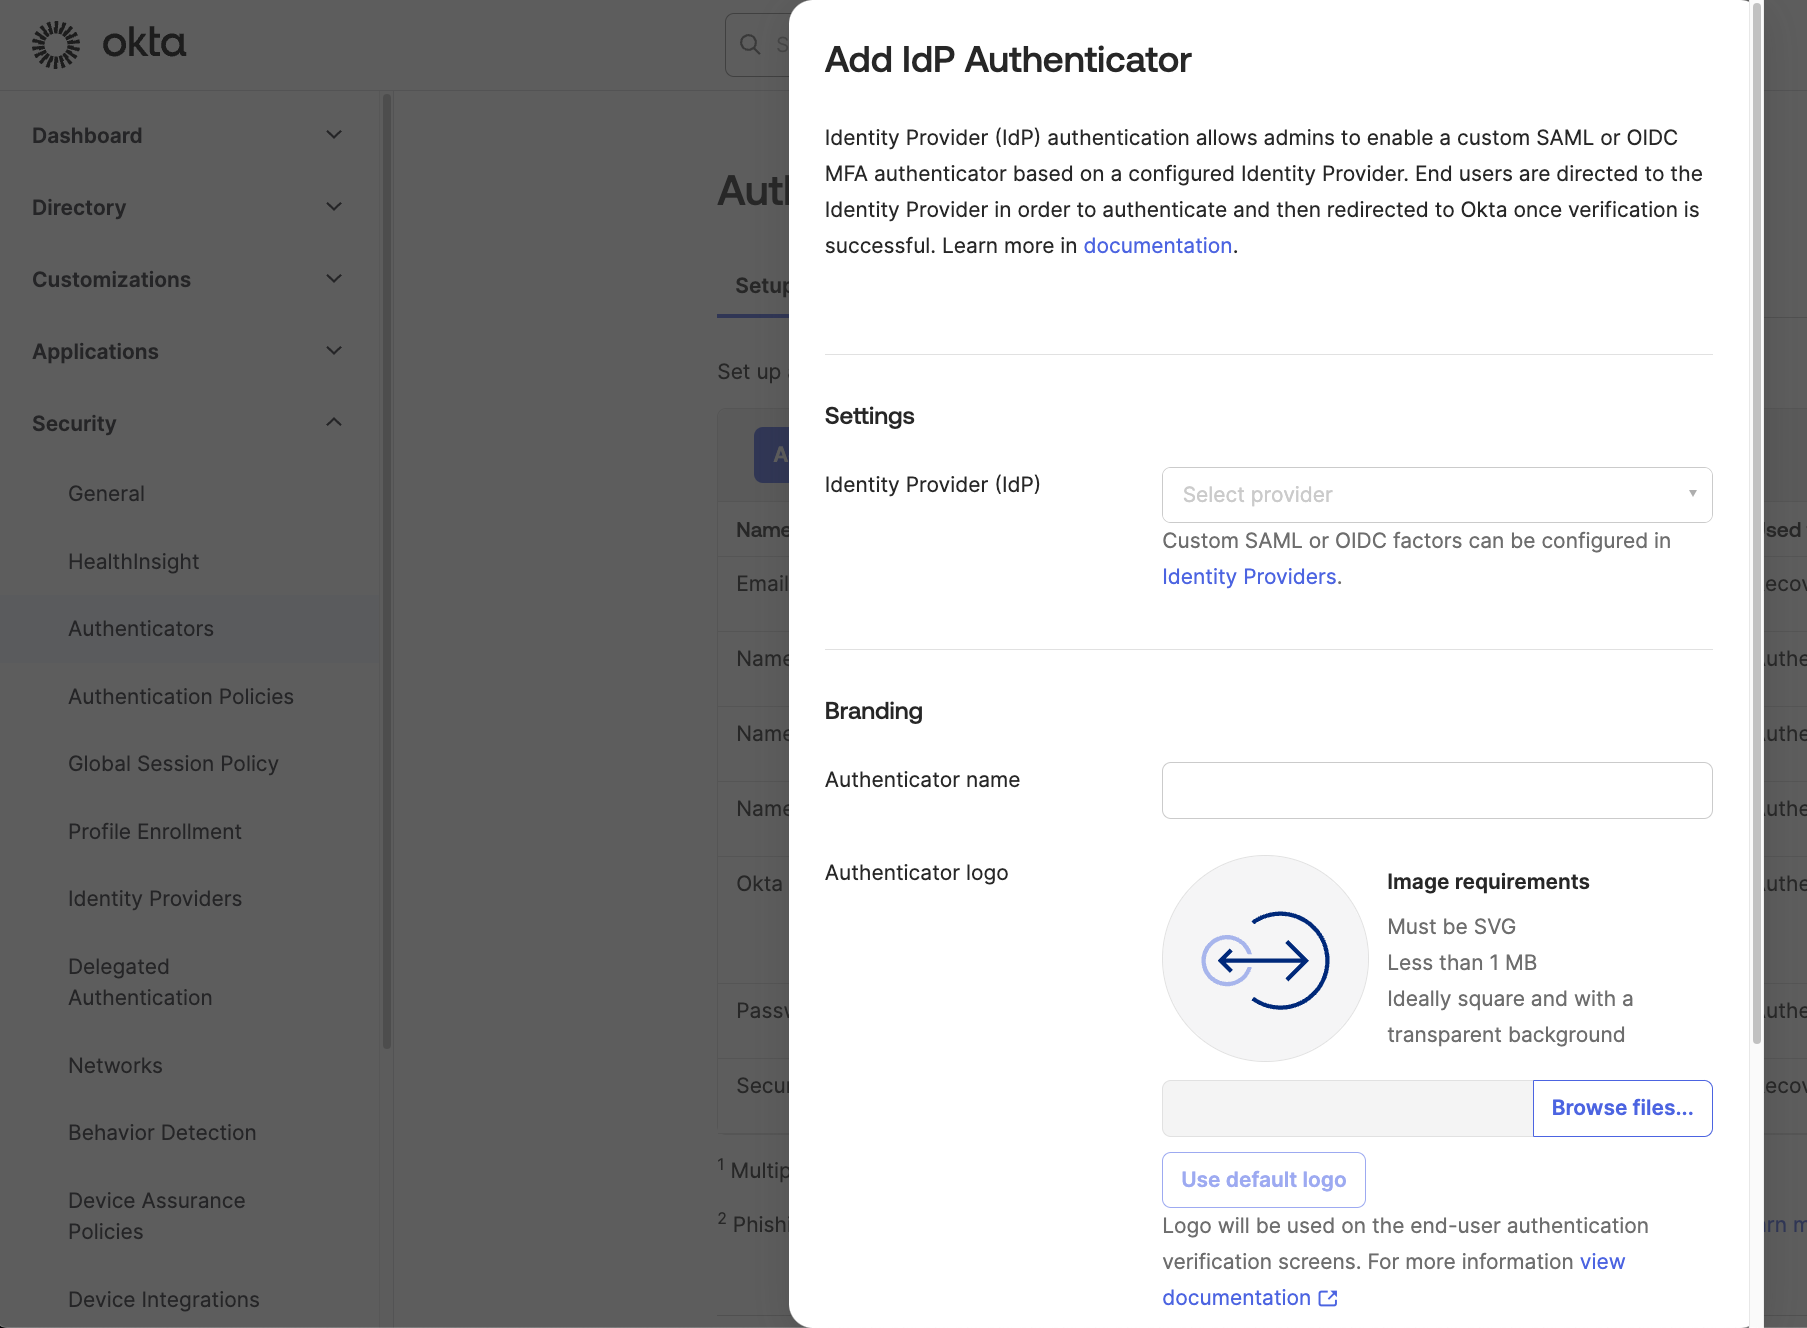
Add IDP authenticator
Testing authentication
-
In an incognito / private browsing window, go to your Okta Tenant sign in page.
-
Enter your email address and password.
-
You will be prompted to select an authentication method. If you already have a MFA method setup for the account you are logging into, you will be prompted to complete that verification. Afterward in your okta settings, you will be able to see the newly created Nametag factor which you can set up as an MFA factor.
Select authentication method -
The Nametag MFA prompt for Okta will show up when selecting to set it up.

Verify with Nametag prompt -
Scan the Nametag QR code and verify your identity.
-
After the Nametag identity verification completes, your browser will automatically return to Okta. The authentication process is now complete.