Configuring SAML SSO to Nametag with Entra ID
Enable access to Nametag using corporate Entra ID credentials
This guide will walk you through the steps to configure SAML SSO to Nametag with Entra ID.
Prerequisites
To configure Nametag for single sign on with Entra ID, you must have:
- An Entra ID account and be an administrator.
- A Nametag organization and an account with the Owner role.
Creating an enterprise application in Entra ID
Sign in to the Azure Portal and search for Entra ID.
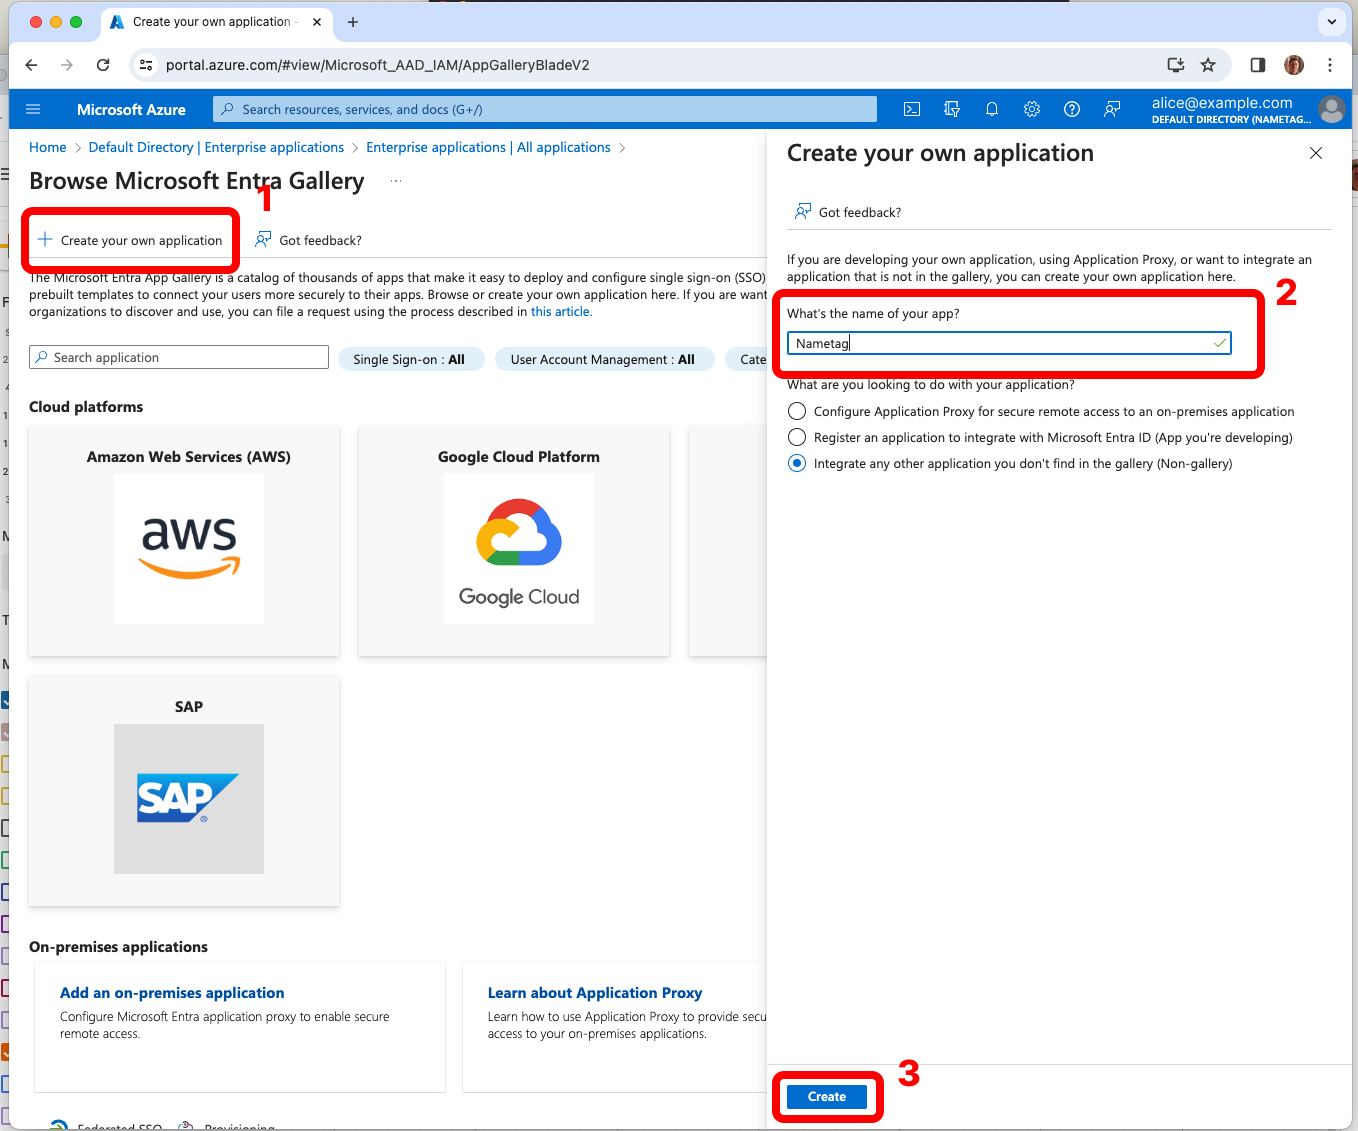
From the Entra ID console’s Overview tab, go to the Enterprise applications and select New application.

Choose Create your own application. Enter Nametag for What is the name of your app? and select Create.
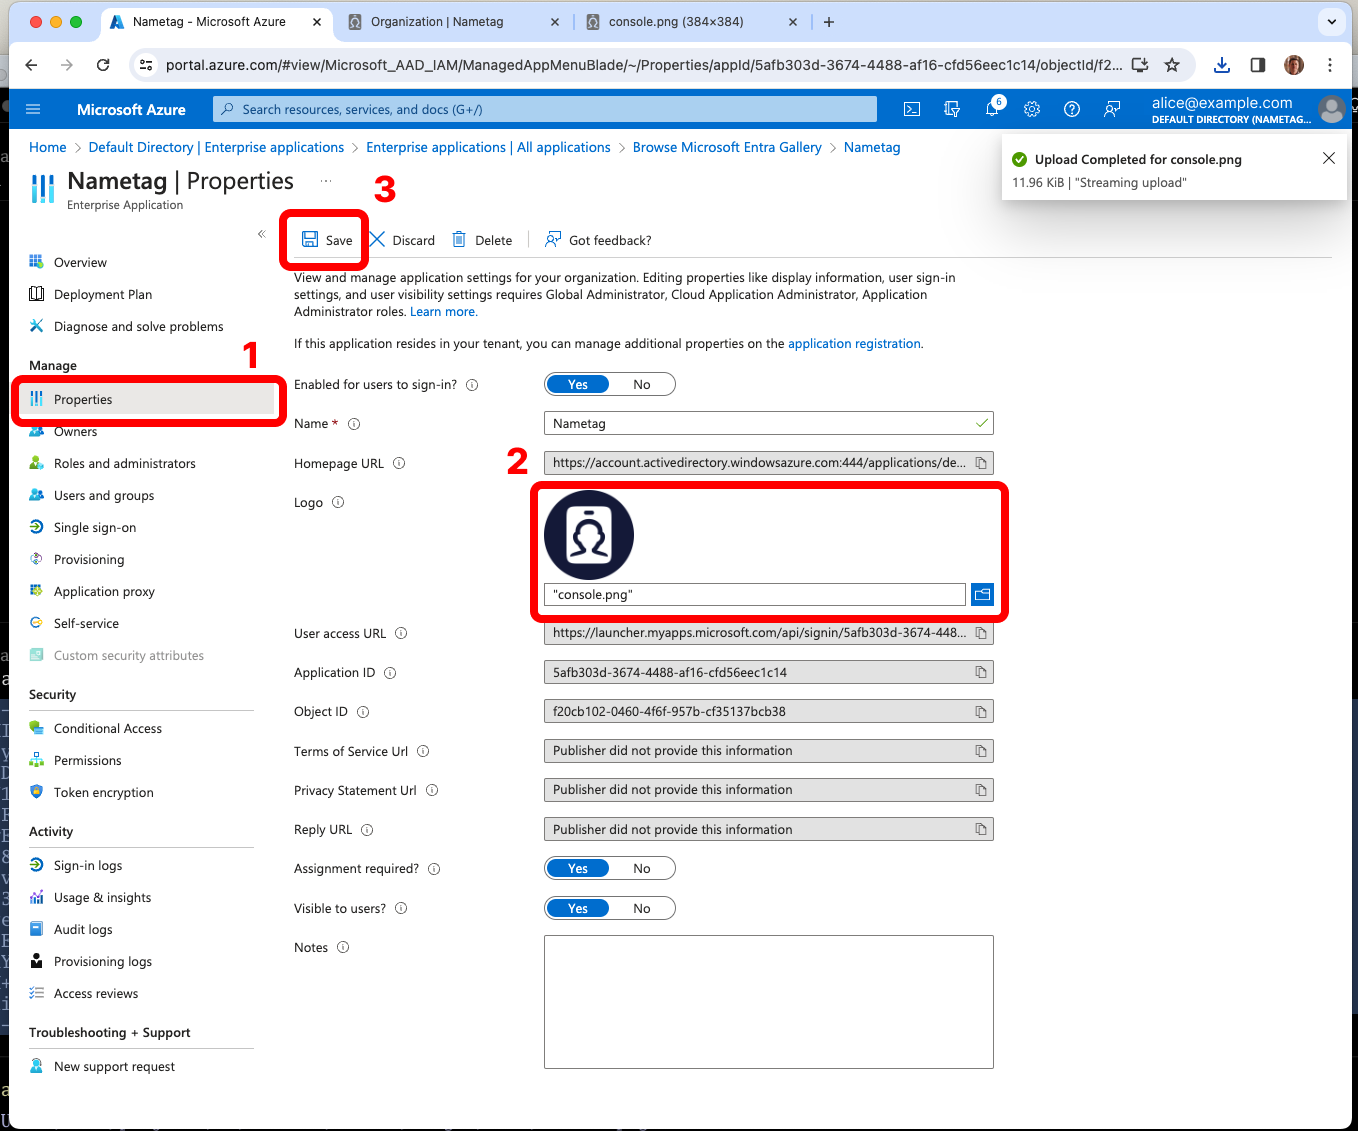
From the left side, select Properties. Download the Nametag logo from https://nametag.co/logos/console.png and upload it to Entra ID. Press Save.
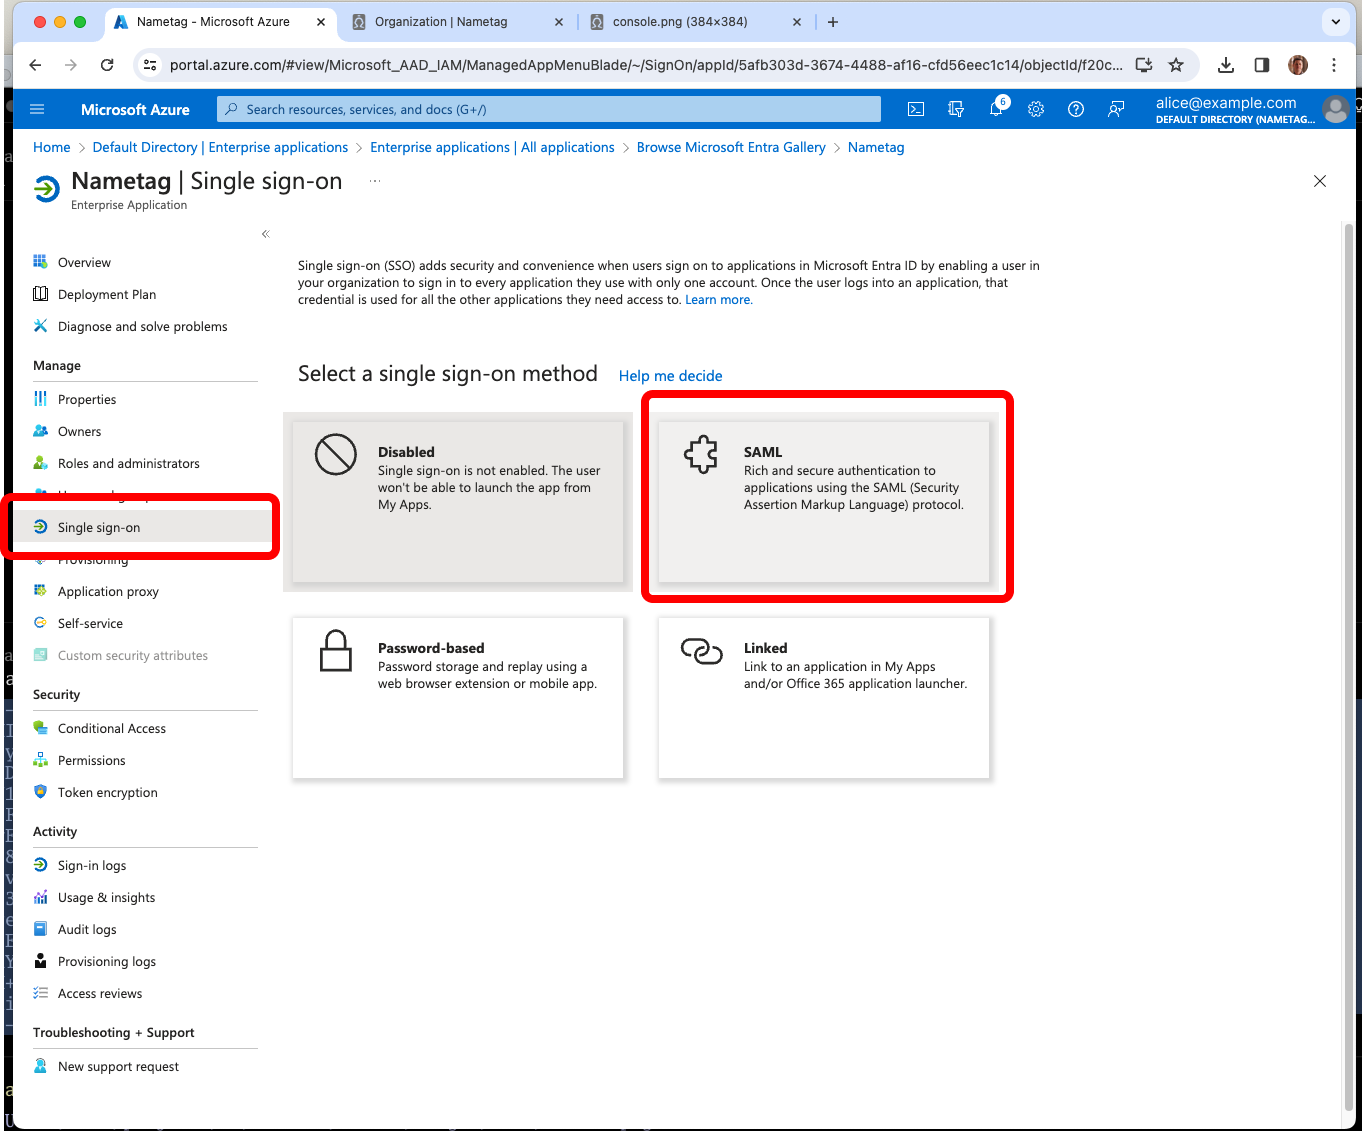
From the left side, select Single sign-on and choose SAML.
Setting the basic SAML configuration in Entra ID
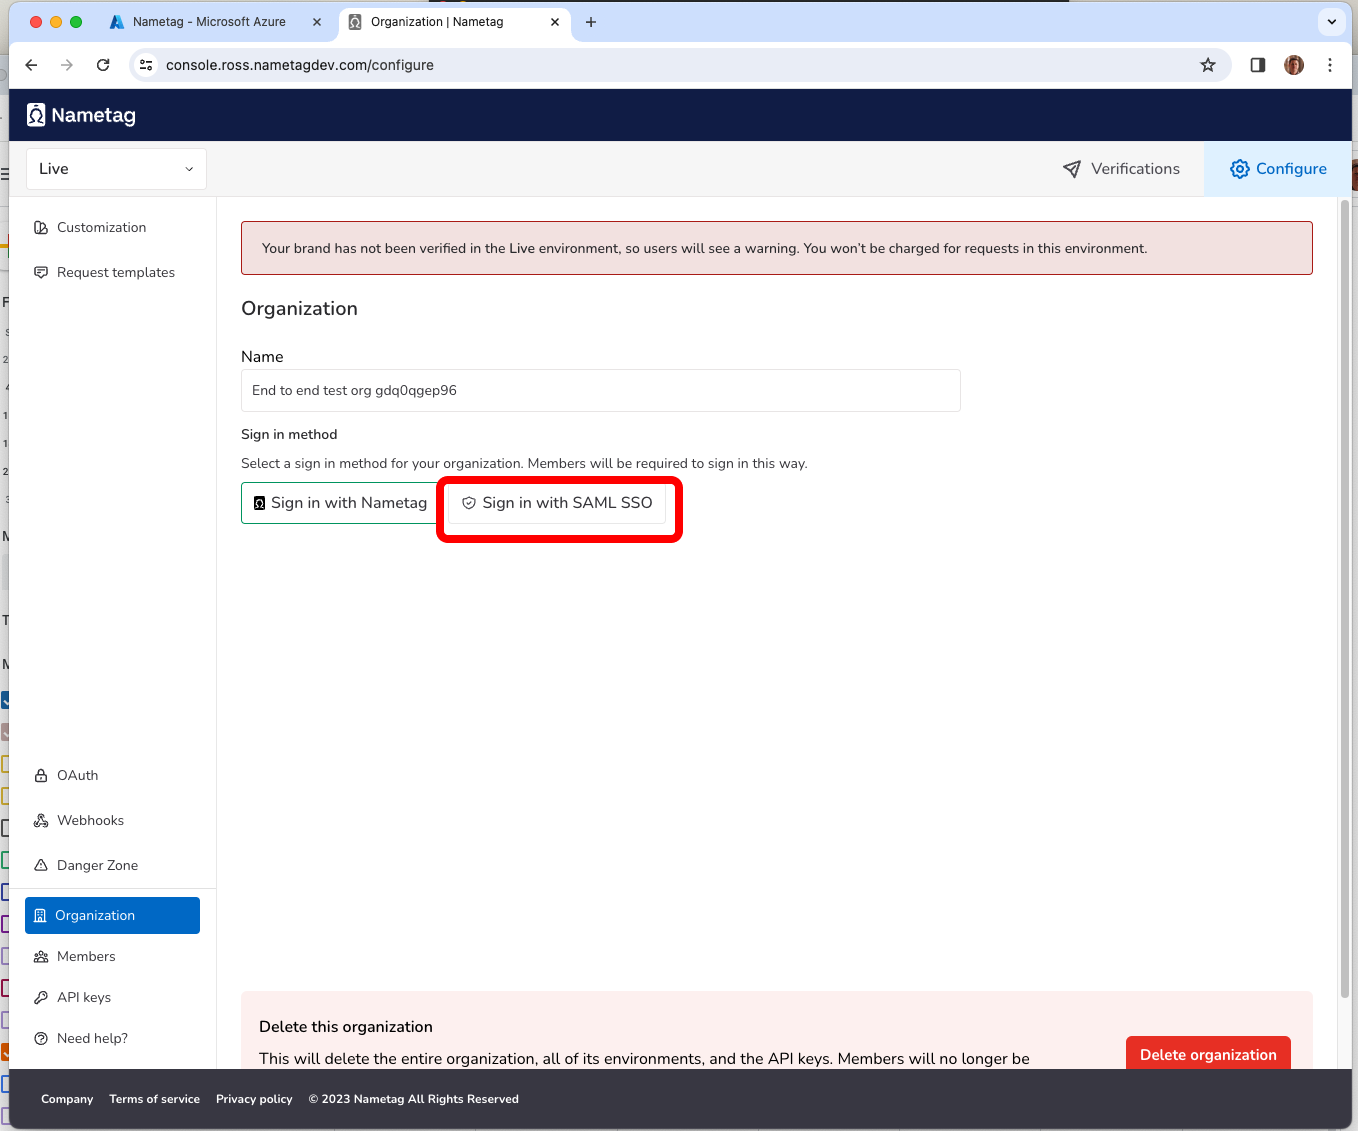
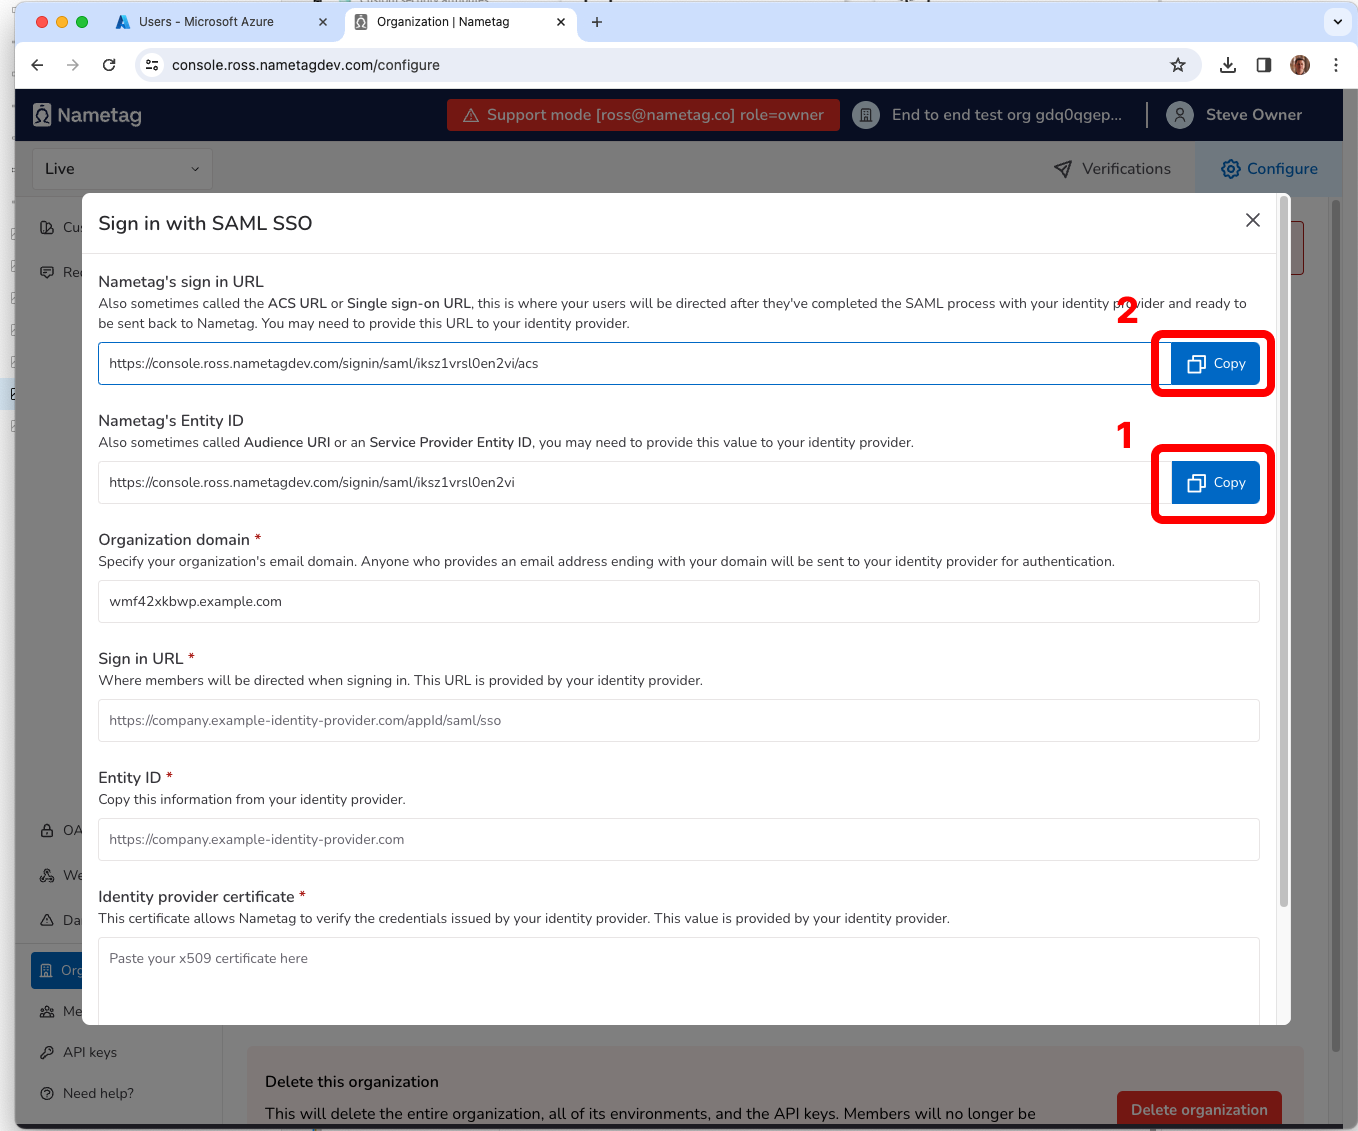
In Nametag, select Configure, then Organization and choose Sign in with SAML SSO.
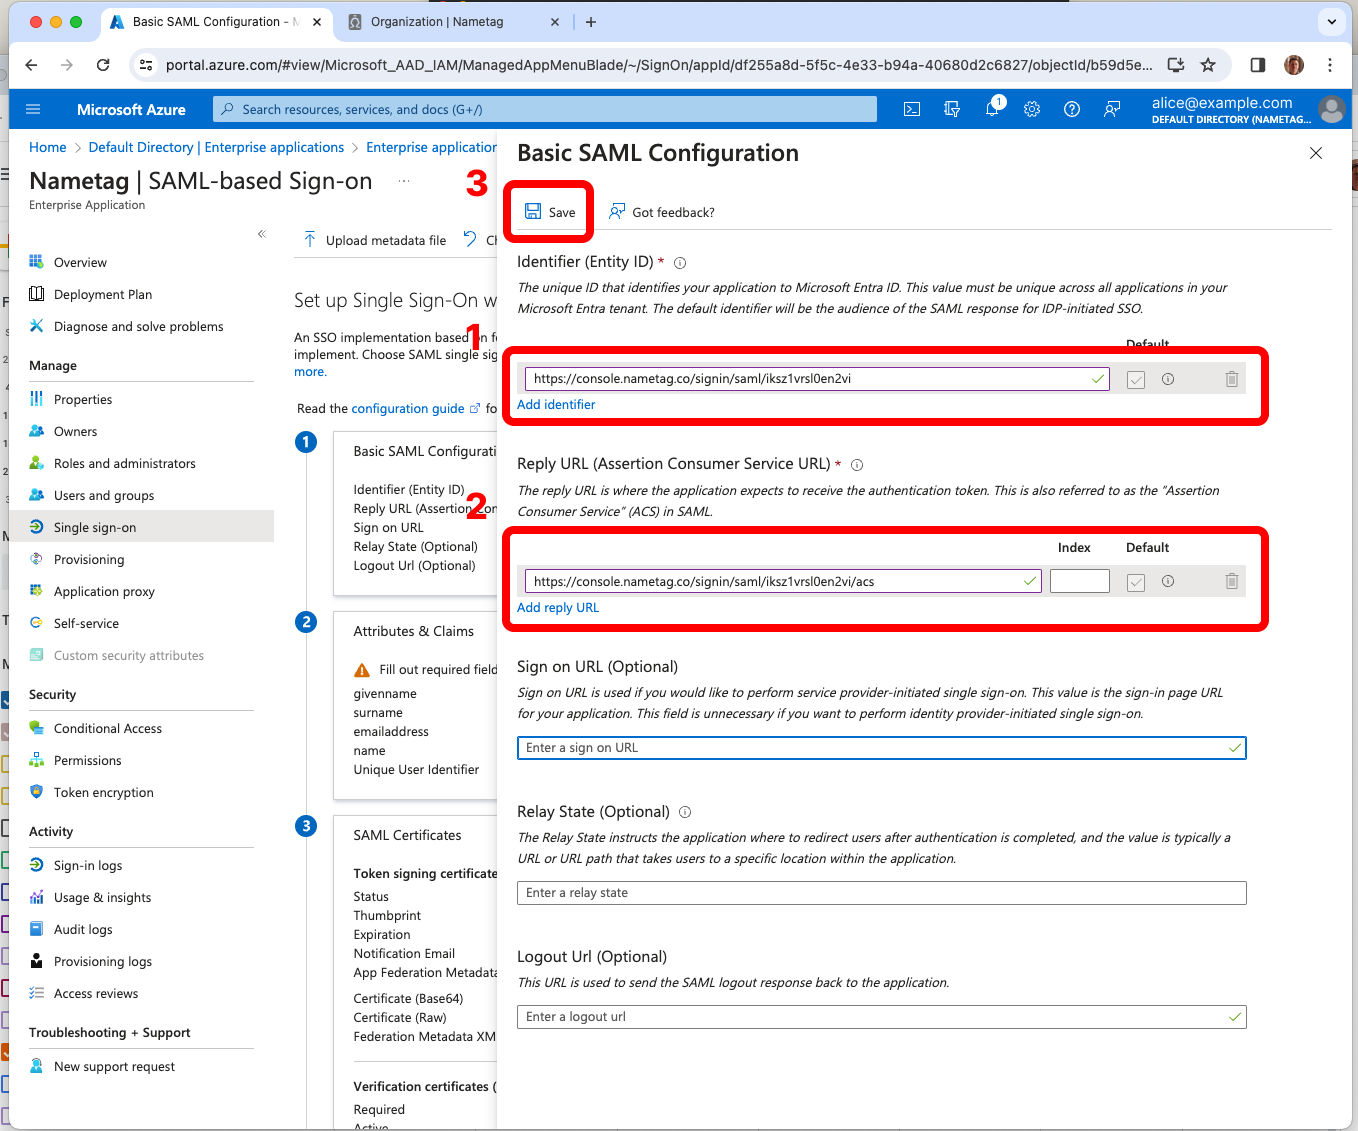
In the Entra ID console press Edit in the Basic SAML Configuration tab.
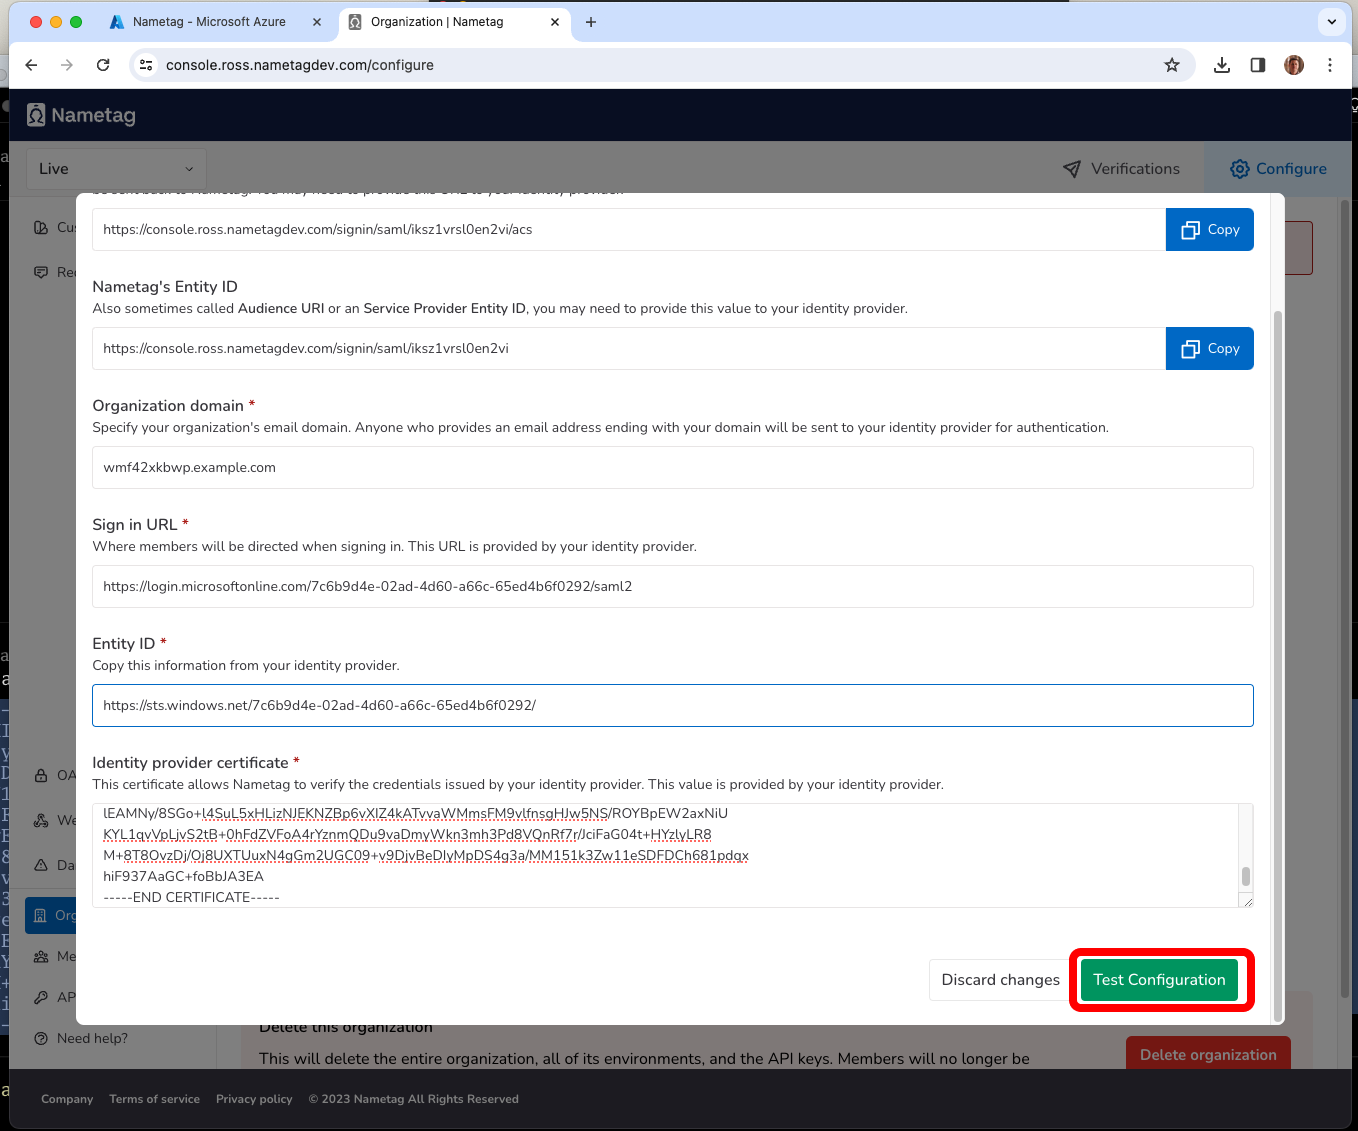
- Add the Identifier (Entity ID) from Entra ID and copy Nametag Entity ID and paste in Entra ID.
- Add a Reply URL (Assertion Consumer Service URL) from Entra ID and copy Nametag sign in URL
- Leave the remaining fields blank.
Press Save.
Gathering information from Entra ID
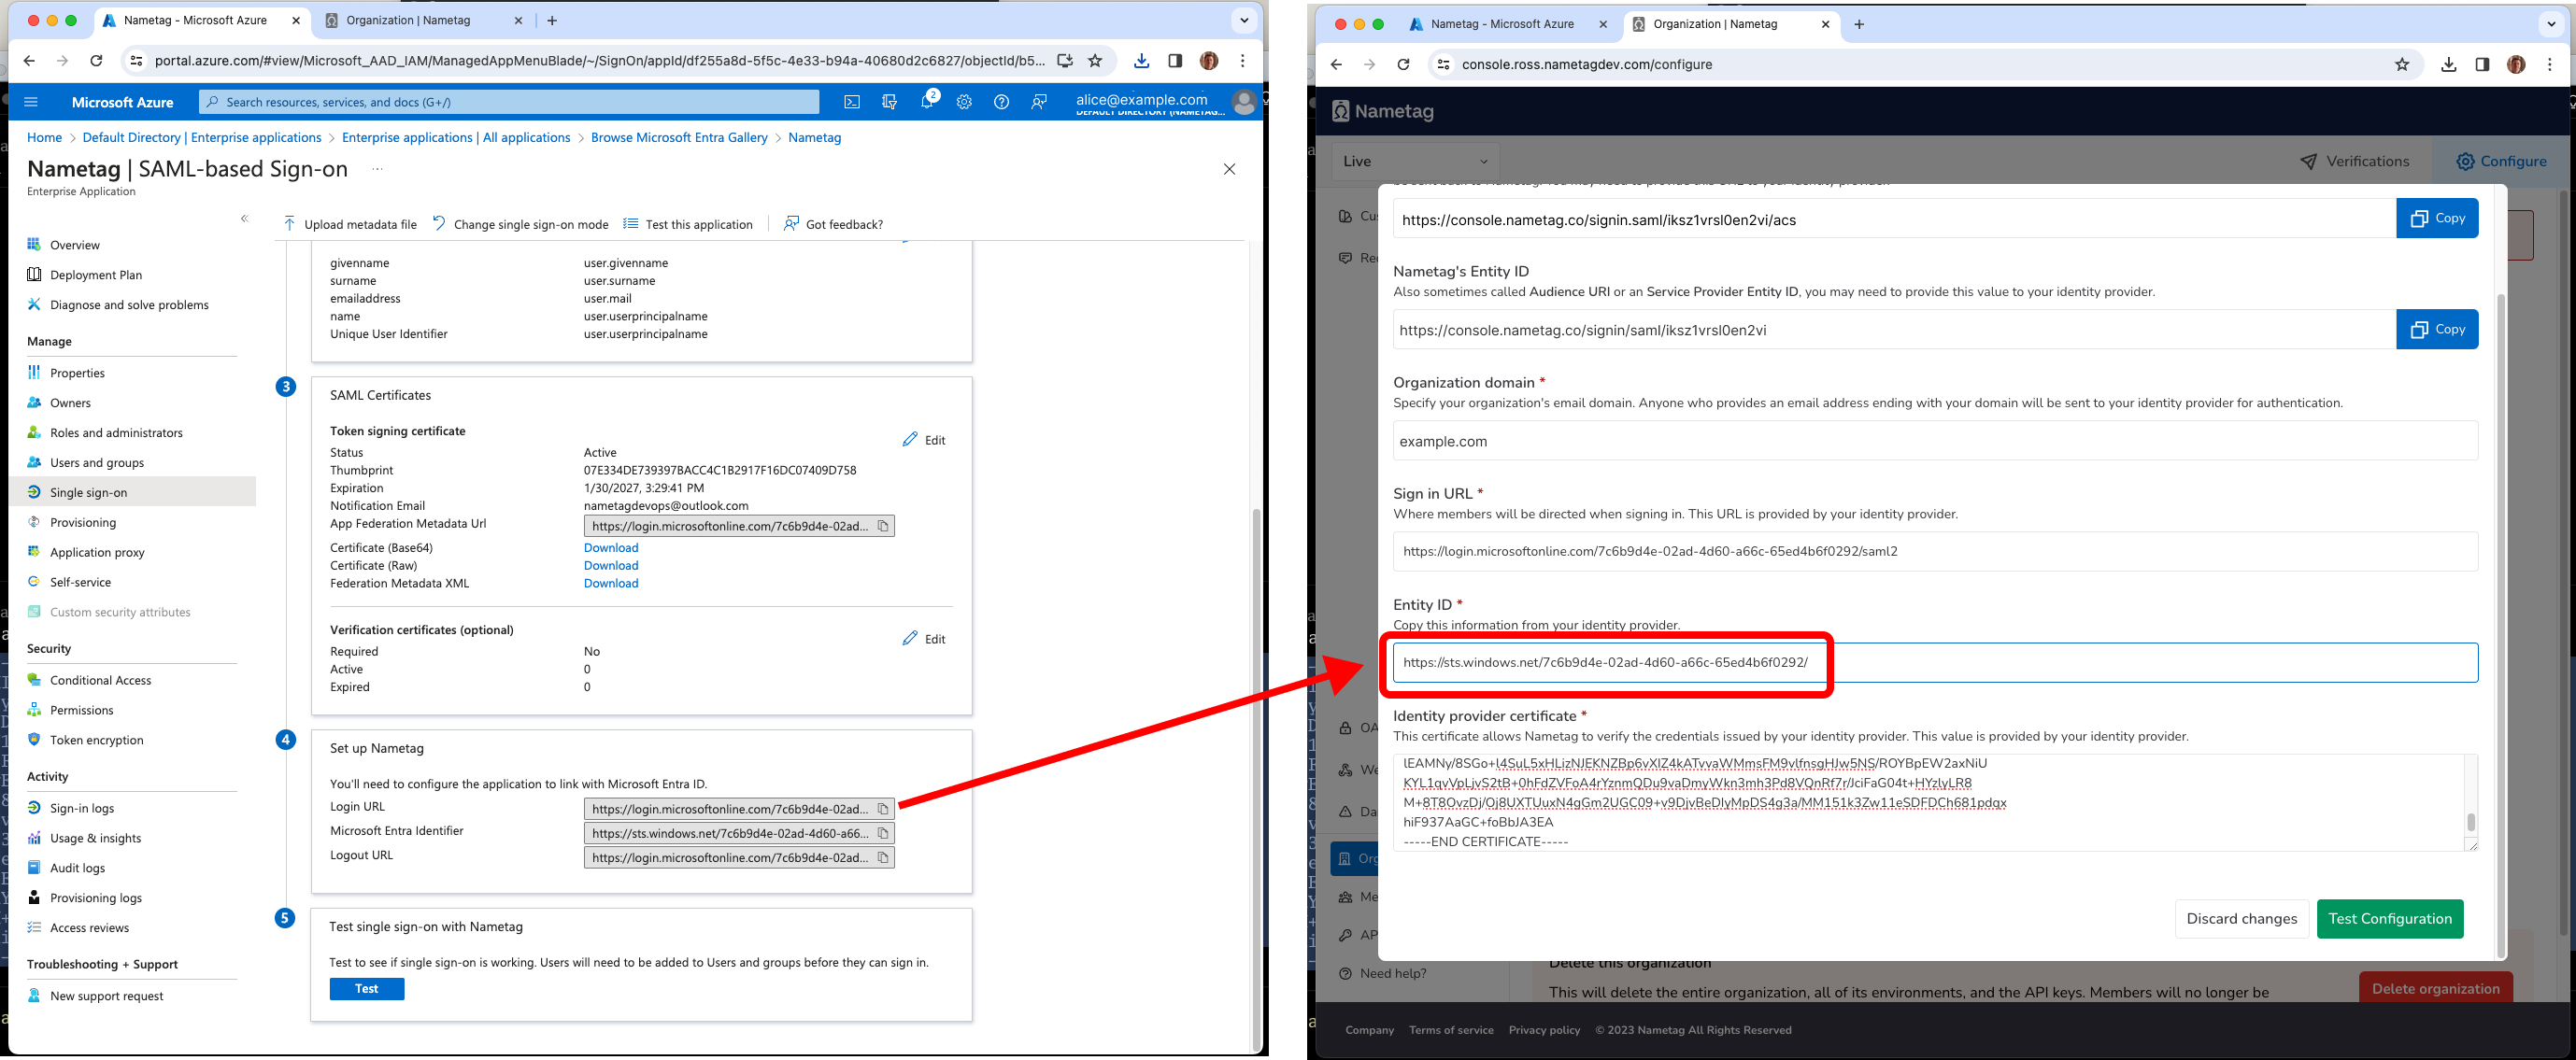
In Entra ID, locate the SAML Certificates section and download Certificate (Base64) and open the resulting file in a text editor. Copy the contents of this file into Identity provider certificate in Nametag.
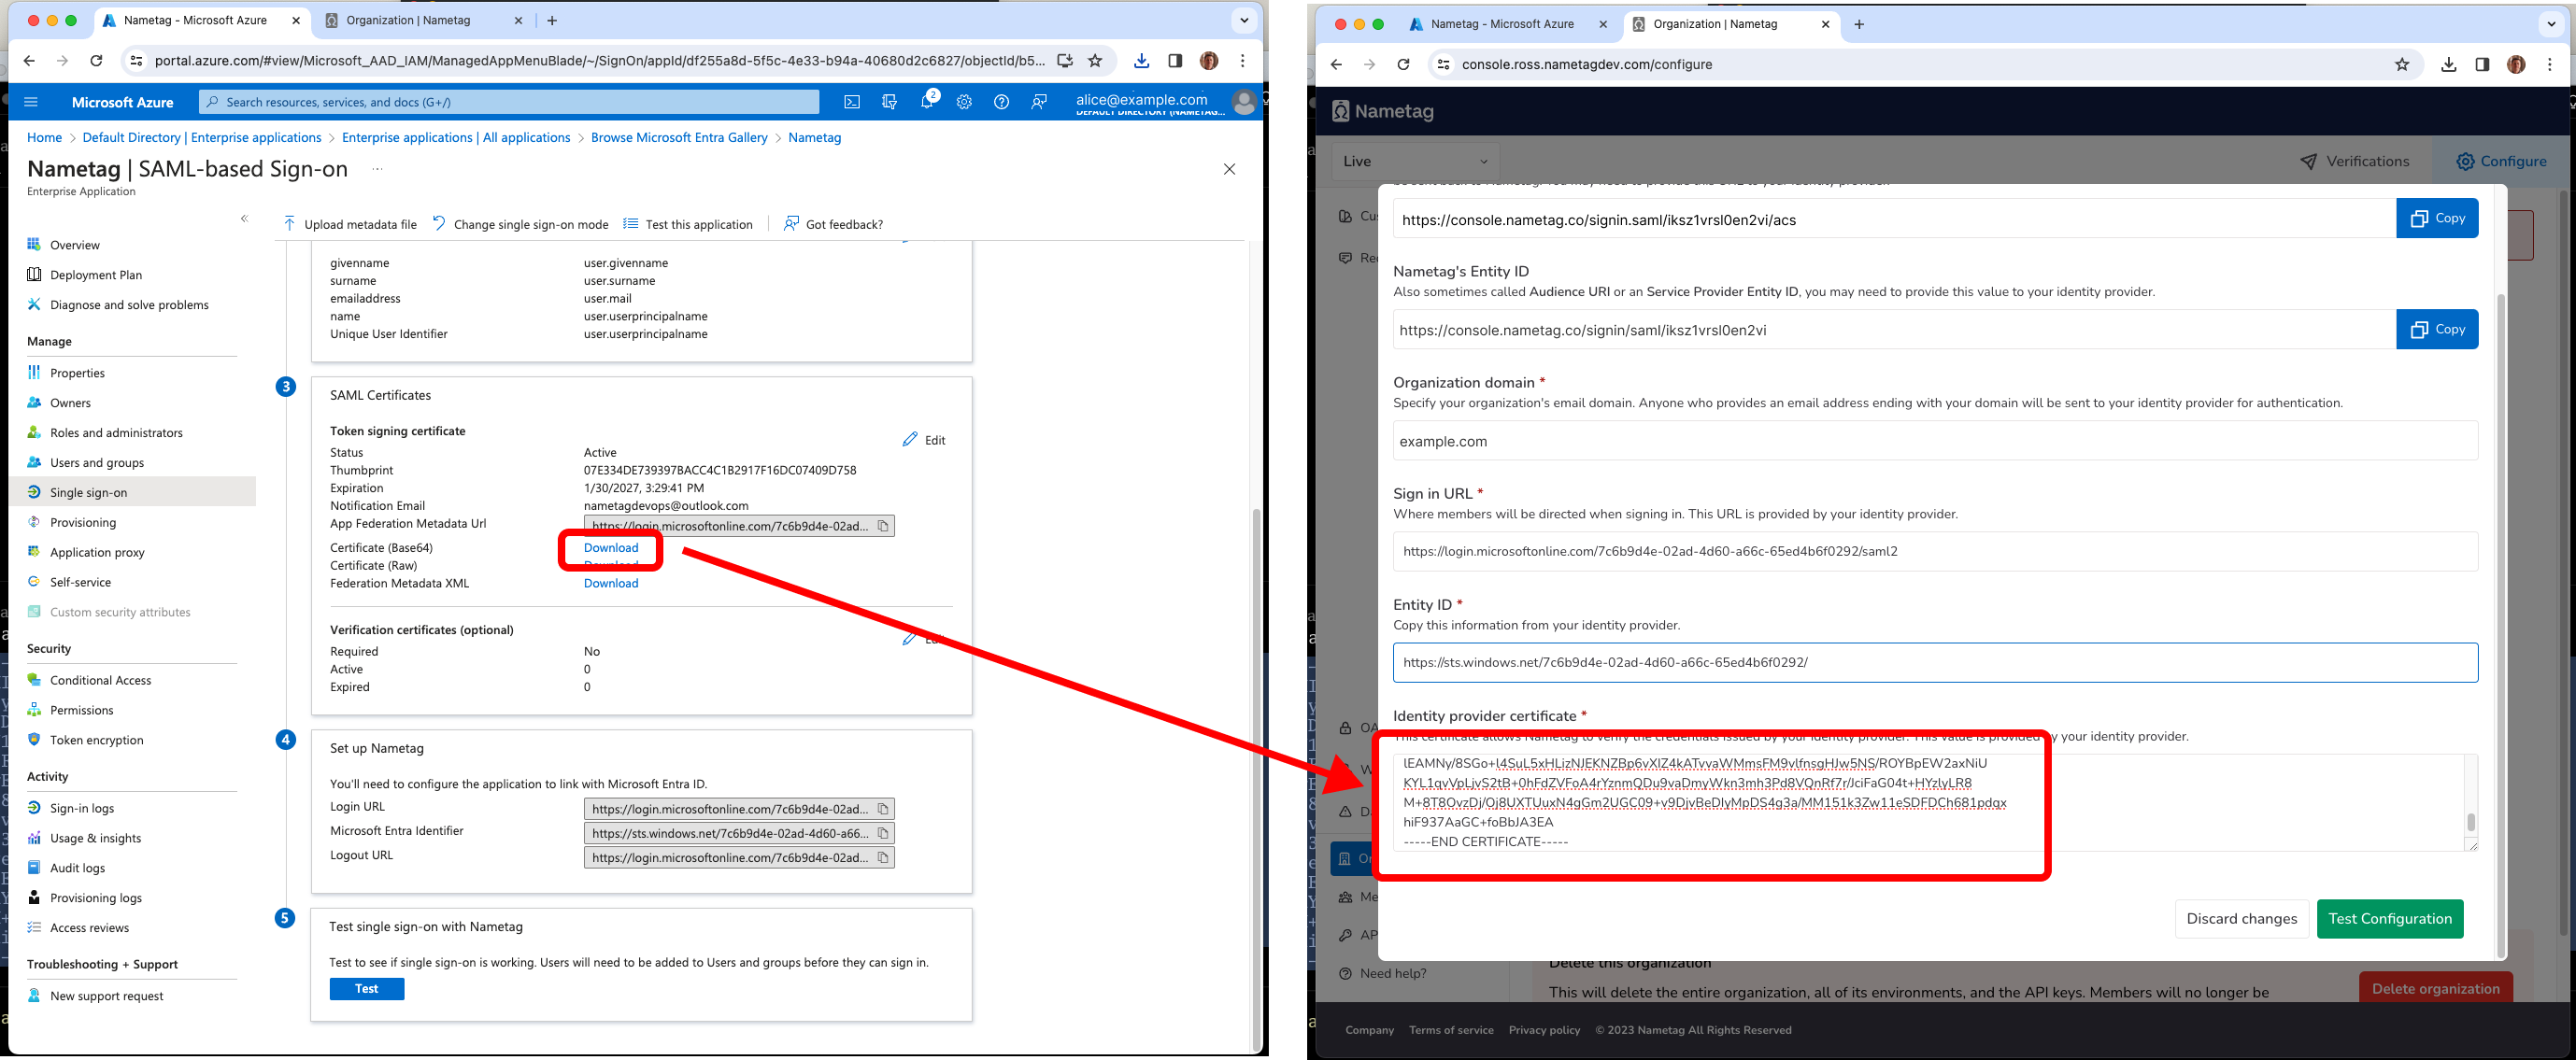
Locate the Set up Nametag section. Copy the Login URL into the Sign in URL field in Nametag.

In the same section, copy Microsoft Entra Identifier into the Entity ID field in Nametag.
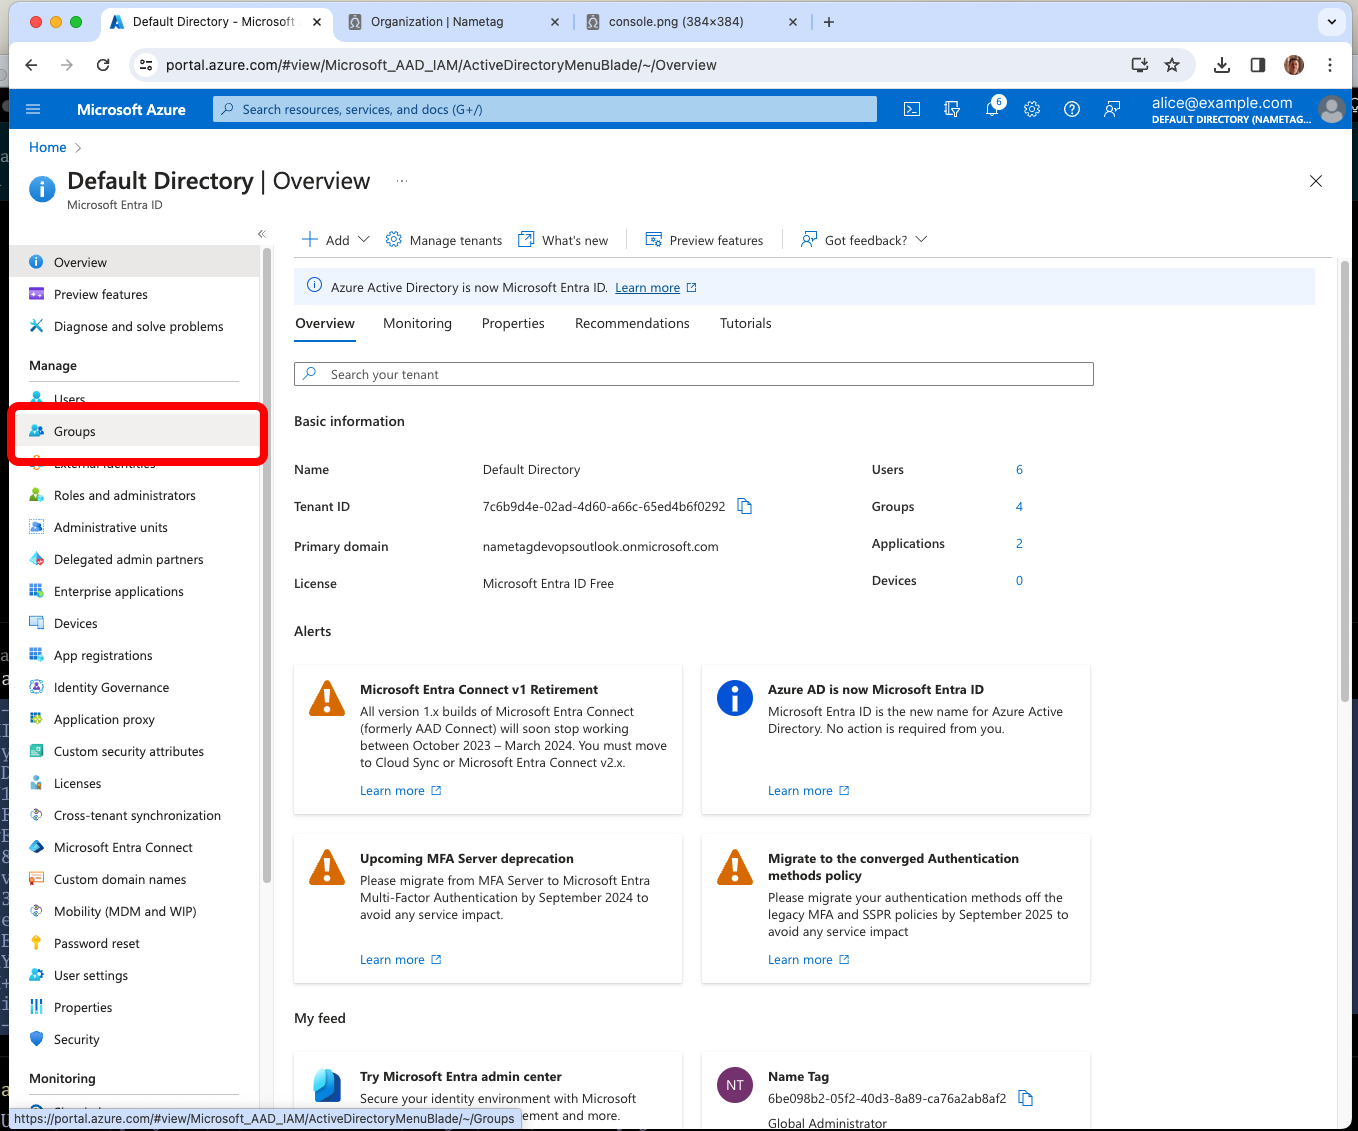
Create groups in Entra ID for each Nametag role
From the root of the Entra ID console, go to Groups
Entra ID must provide Nametag with a group claim that maps to one of the defined roles in Nametag.
Consider creating four groups in Entra ID, one for each role in Nametag.

In Entra ID, go to Directory, then Groups and create a group for each role in Nametag:
| Nametag Role | Entra ID Group Name | Description | |
|---|---|---|---|
| Owner | Nametag Owners | Full access to the organization, all environments, and their configuration | |
| Admin | Nametag Admins | Full access to their environments and their configuration | |
| User | Nametag Users | Access to all requests and detailed results in their environments | |
| Limited | Nametag Limited | Access to only their own requests and simplified results in their environments |
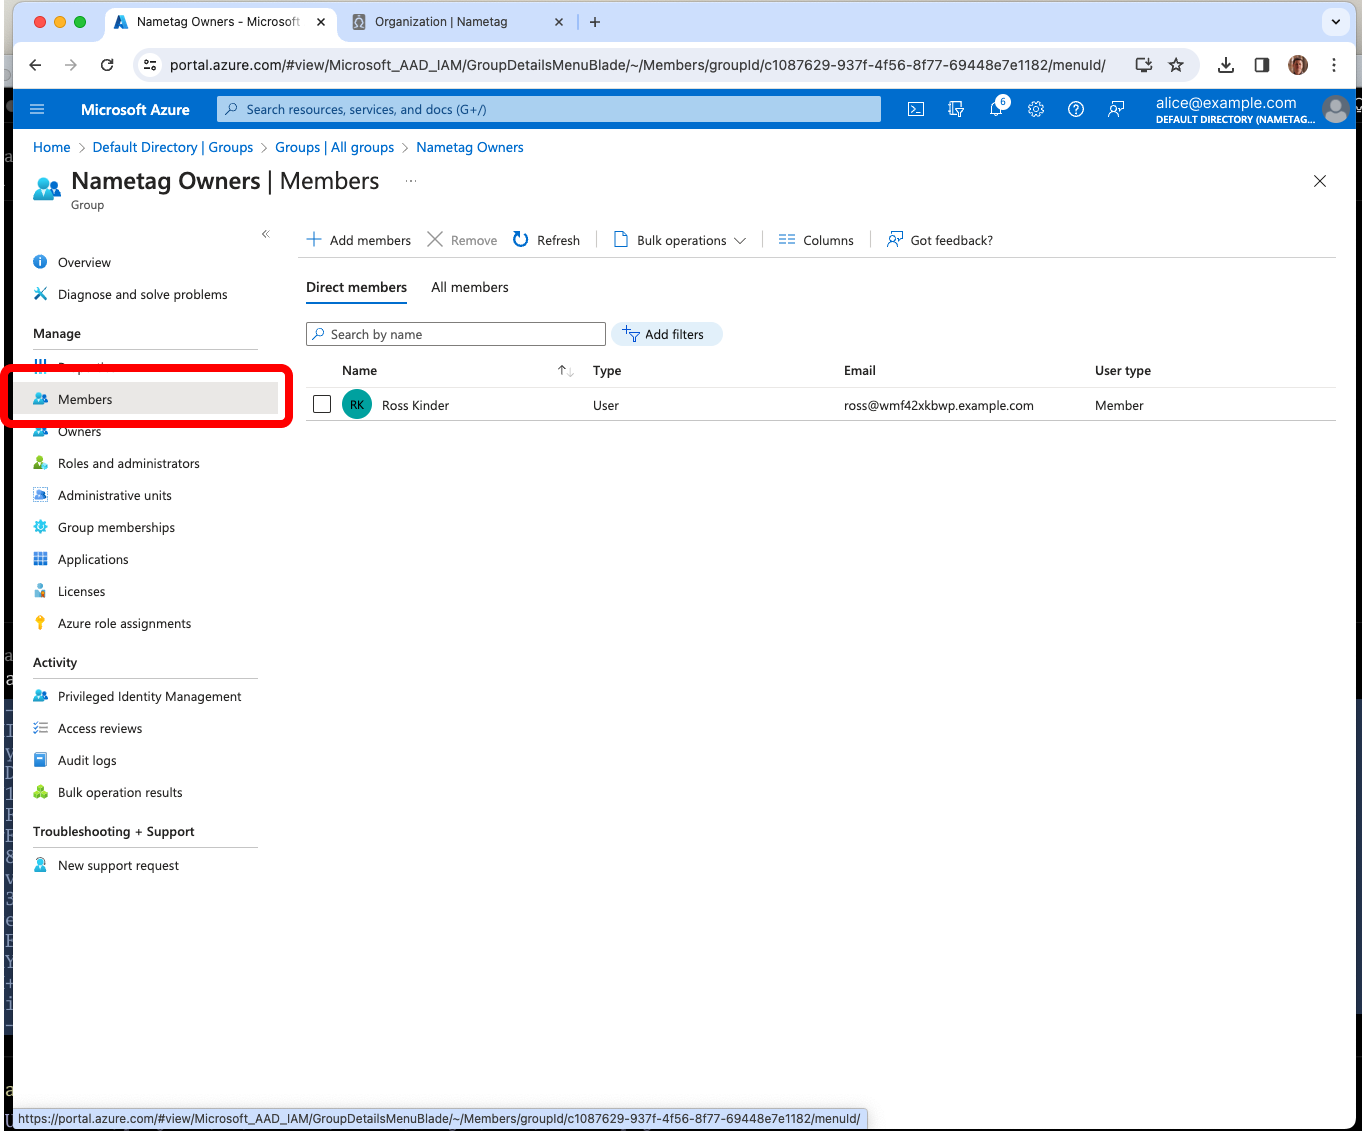
Note: To prevent you from losing access to your Nametag account, we require that your Entra user account is a member of the Nametag Owners group to save the Nametag SAML configuration.
Export group membership via SAML
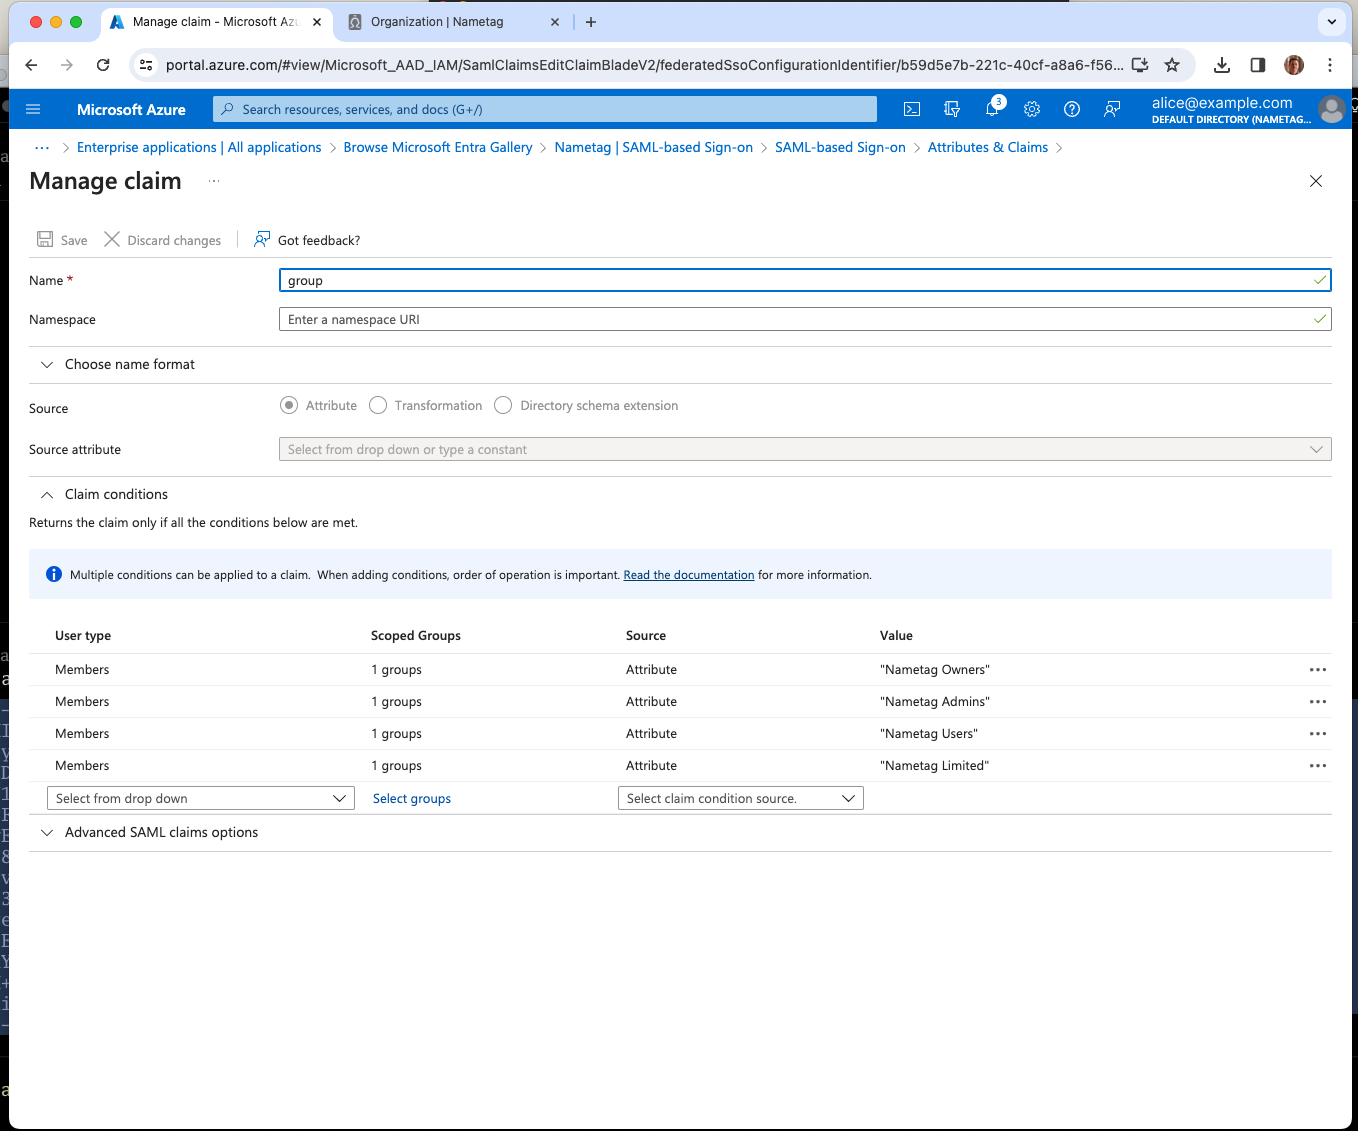
Return to the Nametag enterprise application, select SAML on the sidebar. Find the Attributes and Claims box and select Edit.
Select Add new claim and type group for the Name field.
Expand Claim conditions and add a condition corresponding to each group:
- For User type choose Members.
- For Selected Groups choose the group your created, for example Nametag Owners.
- For Source choose Attribute.
- For Value type
Nametag Owners.
After you create all four claim conditions, press Save.
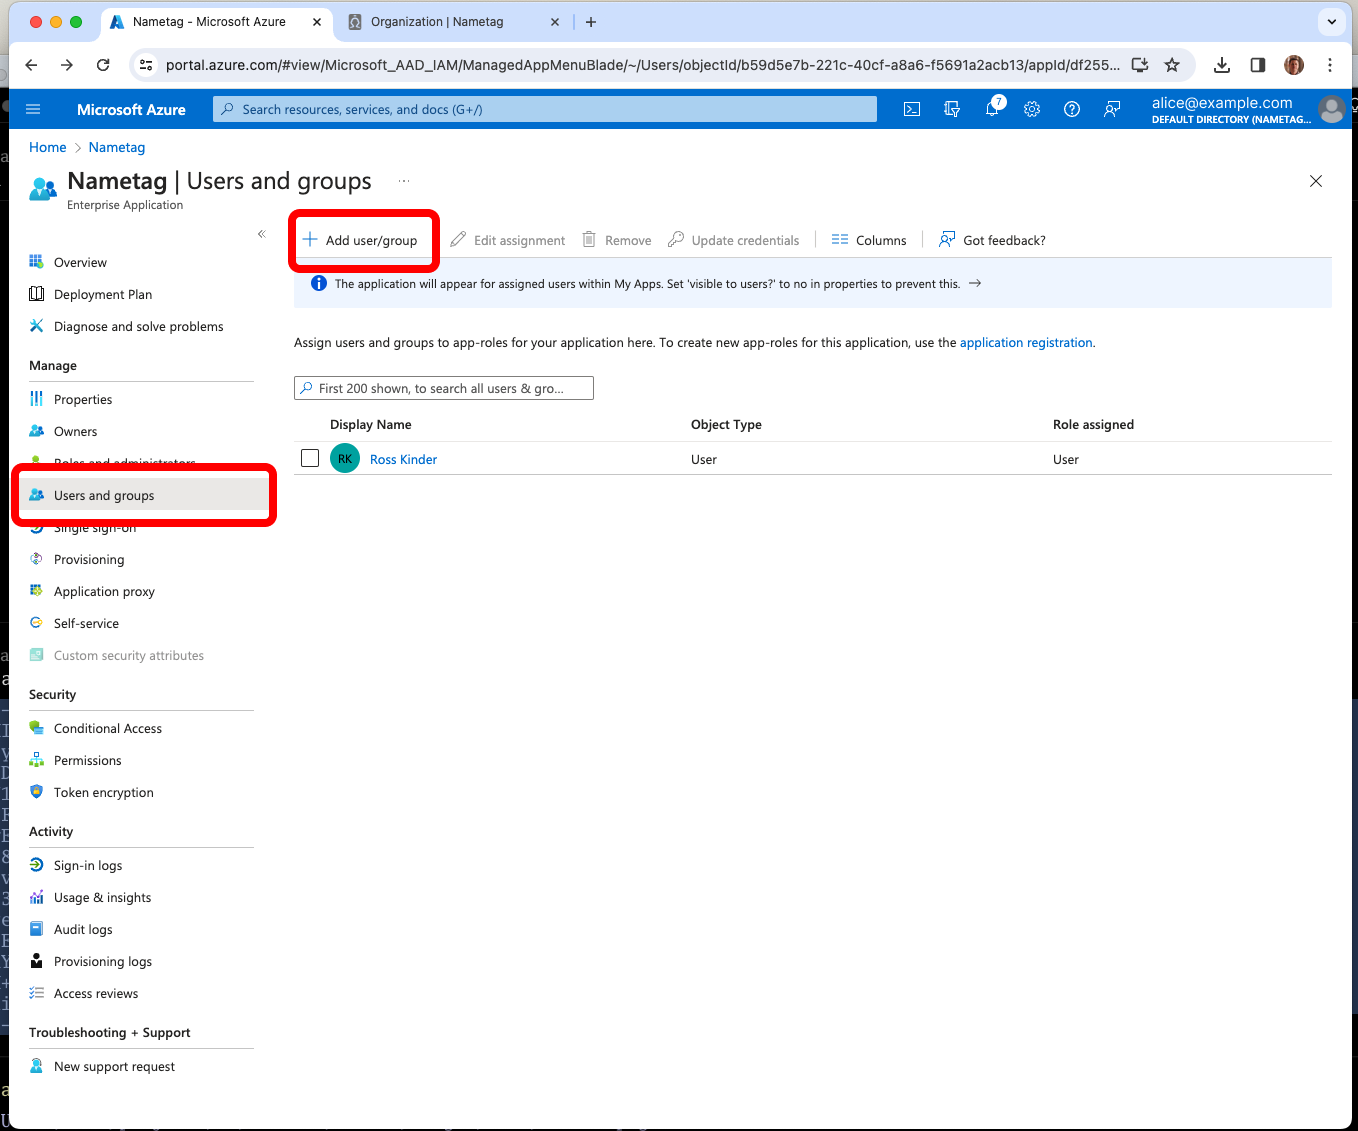
Assign Entra users or groups to Nametag
In Entra, go to the Users and groups tab of the Nametag enterprise application.
Add the users or groups that should have access to Nametag and press Assign.
Testing your configuration
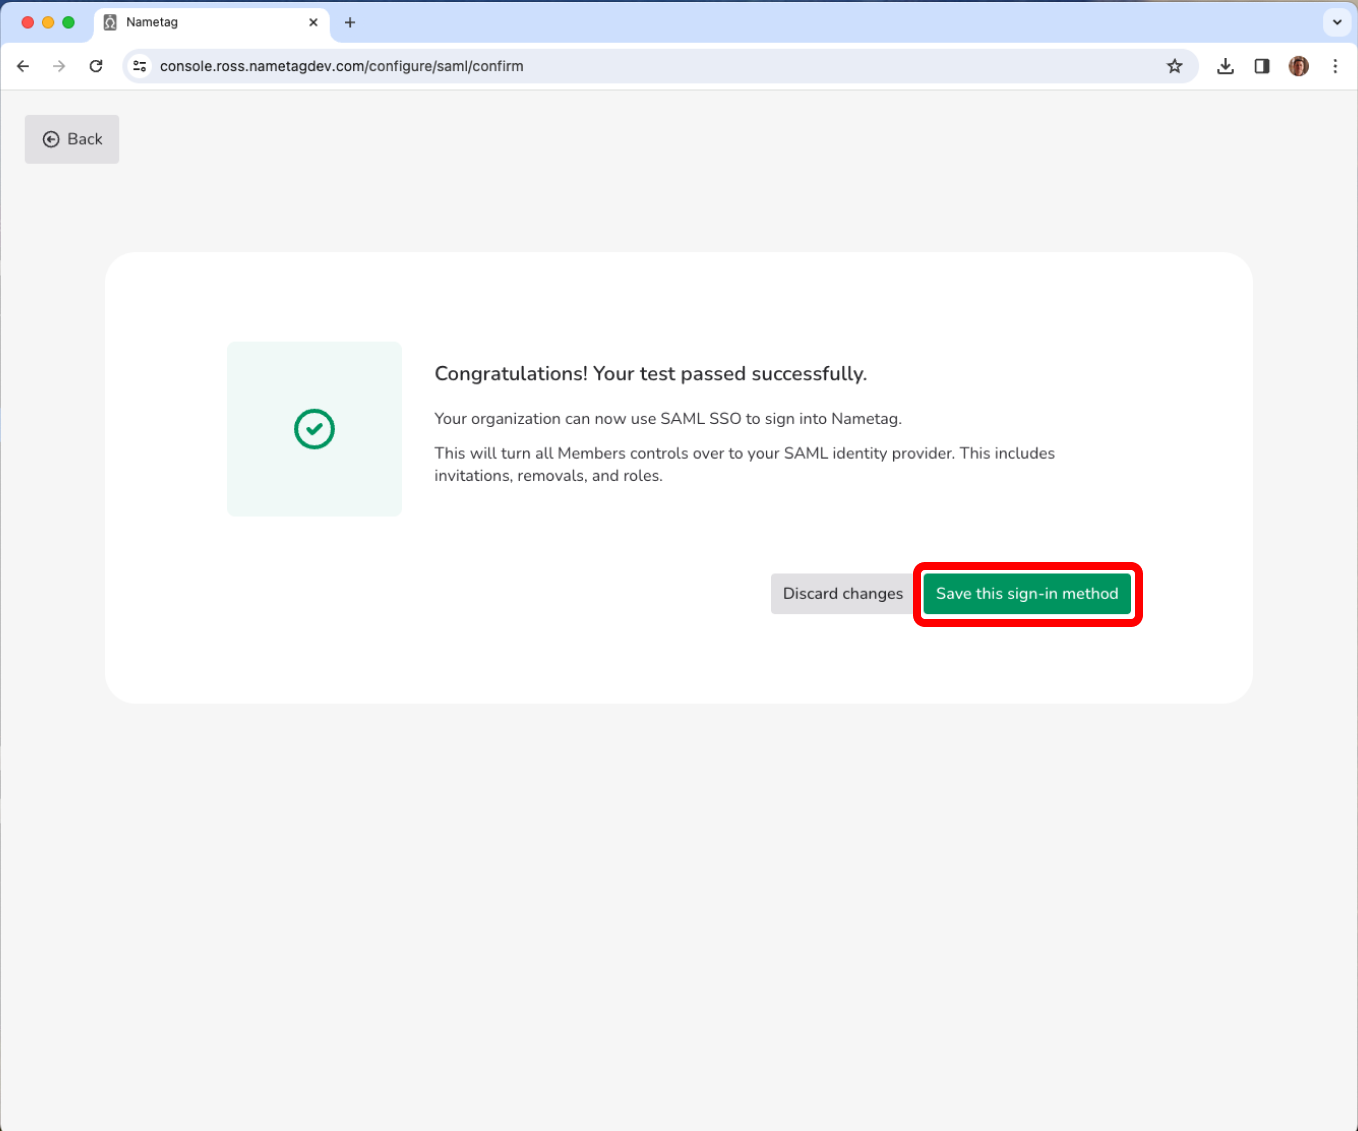
Note: The Nametag configuration is not saved until the configuration has been successfully tested using Nametag. Until you press Test configuration in Nametag, Test this application will not work in the Entra ID console
Press Test configuration in Nametag.
You will be prompted to sign in to Entra ID, if needed, and then be sent back to Nametag. When prompted, press Save this sign-in method.
Congratulations! You have successfully configured SAML SSO to Nametag with Entra ID.