Logging to Splunk
Splunk is a common Security Information and Event Management (SIEM) and log collection tool. Nametag logging is based on webhooks. Splunk can accept webhooks. The following steps describe how to configure Splunk and Nametag so that logs from Nametag appear in Splunk.
Note: Nametag requires valid TLS certificates to deliver webhooks; trial instances of Splunk Cloud do not generate valid TLS certificates and thus cannot receive messages from Nametag. In the webhook details in the Nametag console, you will see an error like
tls: failed to verify certificate: x509: certificate is not valid for any names, but wanted to match prd-x-xyxyx.splunkcloud.com.
These steps document the connection to a Splunk Cloud instance; the configuration for Splunk Enterprise is similar.
Splunk configuration
Nametag will send logs to Splunk using the HTTP Event Collector (HEC), so the first step is to create a new HEC in Splunk.
-
From the Settings menu, select Data inputs
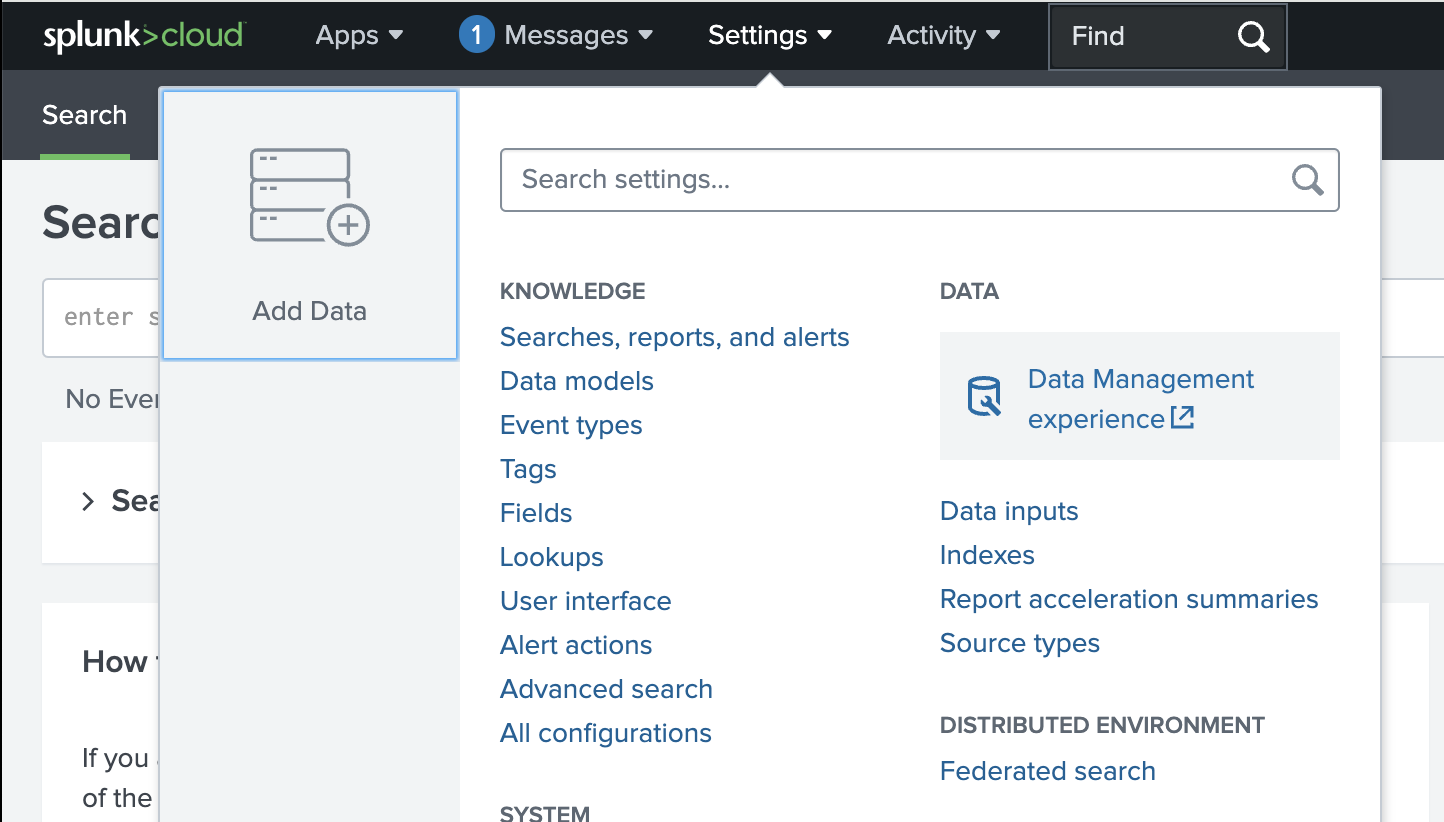
Splunk Settings menu -
On the Data inputs page select HTTP Event Collector
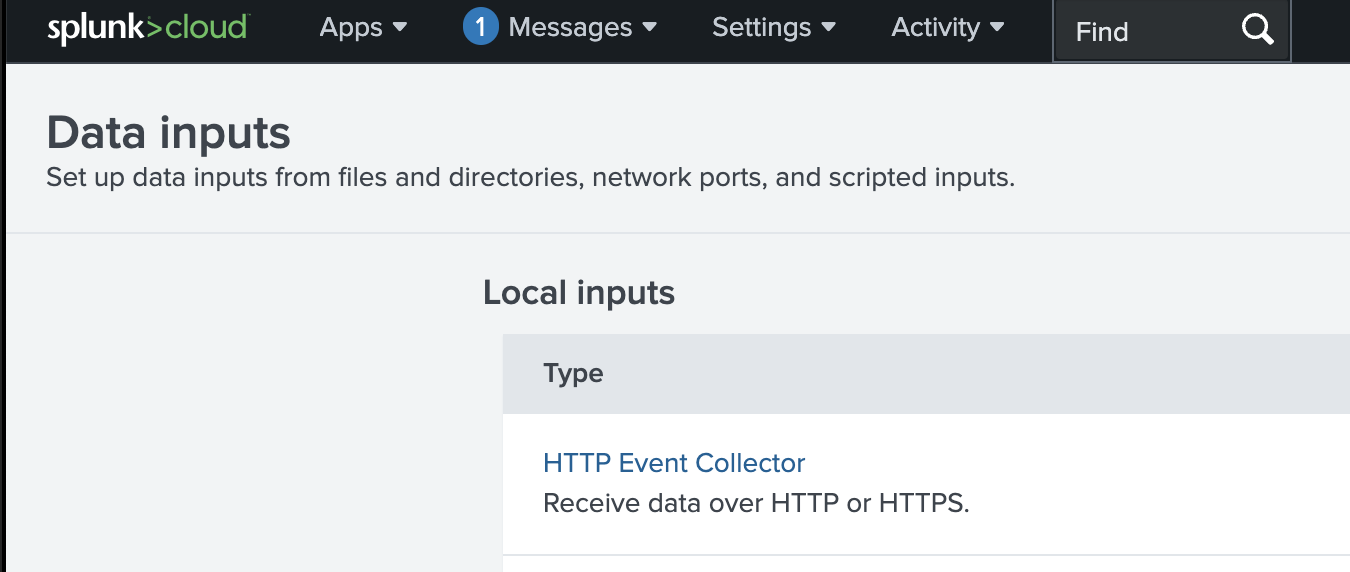
Splunk Data inputs page -
On the HTTP Event Collector page, select the New token button and enter
Nametagas the Name,nametagas the Source name override andLogs from Nametag (nametag.co)as the description; you do not need to check Enable indexer acknowledgement. Then select Next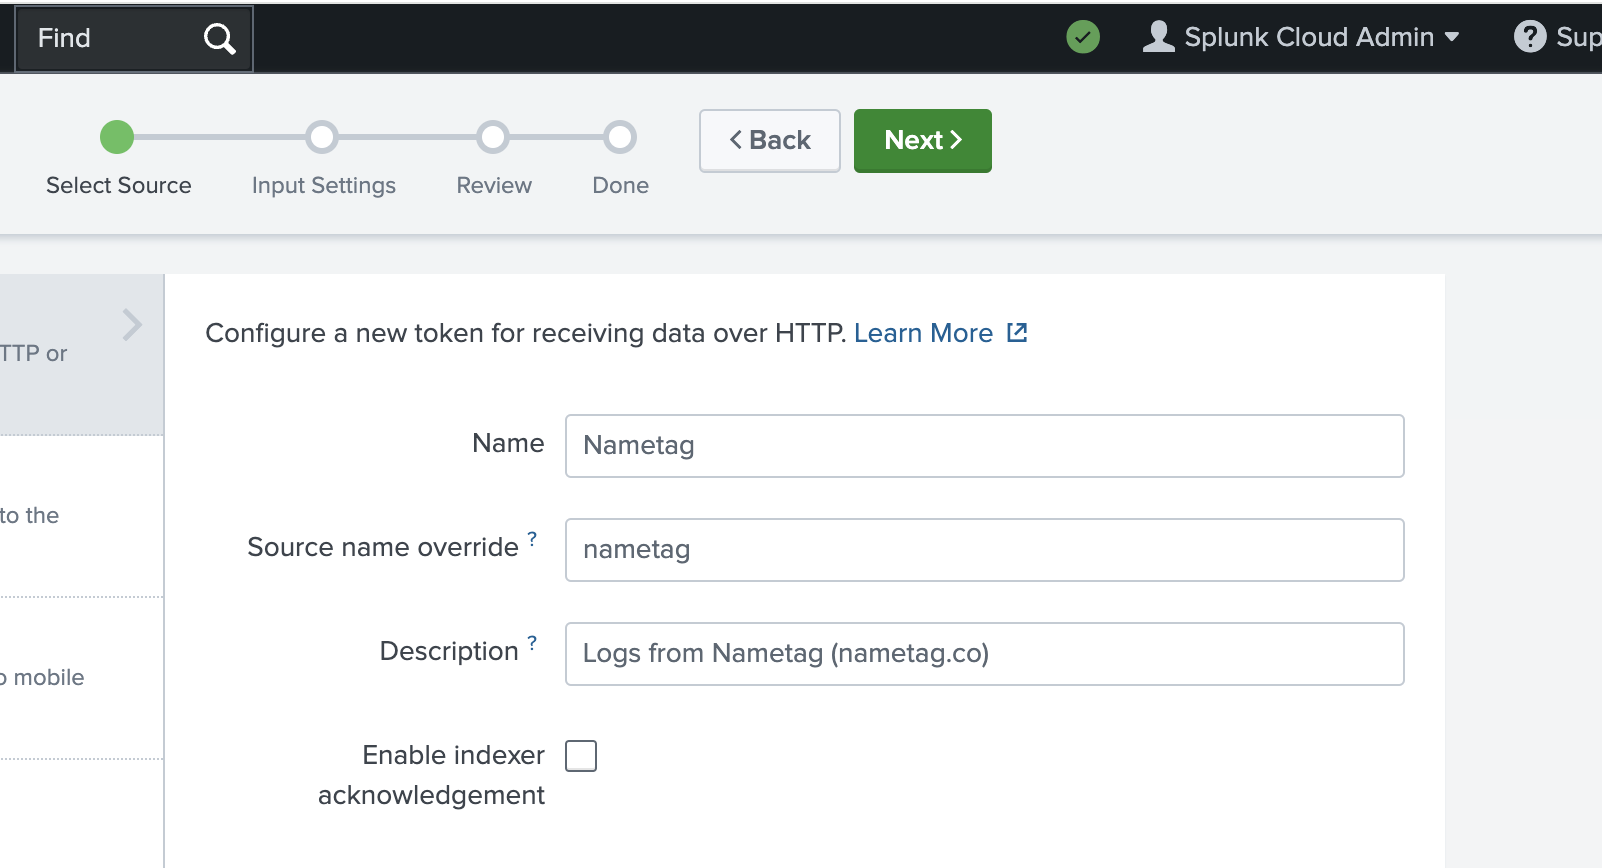
Splunk HEC configuration - page 1 -
On the Input Settings page, accept the defaults and select Review and on the Add Data page select Submit; you can copy the token from this page or from the Data inputs/HTTP Event Collector page.
Nametag configuration
In the Nametag configuration (https://console.nametag.co/configure) page, go to the Webhooks section to create (or add) the webhook that you’ll use to send logs to Splunk. The Nametag API reference has documentation on webhooks.
-
In the Delivery URL field, enter
https://x:*HEC_TOKEN*@*HOST*.splunkcloud.com/services/collector/rawwhere you should replace the string
*HEC_TOKEN_GOES_HERE*with the HEC token from Step 4 above and replace*HOST*with the name of your Splunk Cloud collection host.Note: There may also be a port number after
splunkcloud.com; if your Splunk Cloud URL contains one you must also include it here -
For logging that has no PII you can turn on the options Data is shared with you, Data shared with you is revoked, and A user completes self-service account recovery. For verbose logging that may include PII, you can enable A request is created or updated.
At this point, the Nametag configuration will look something like:
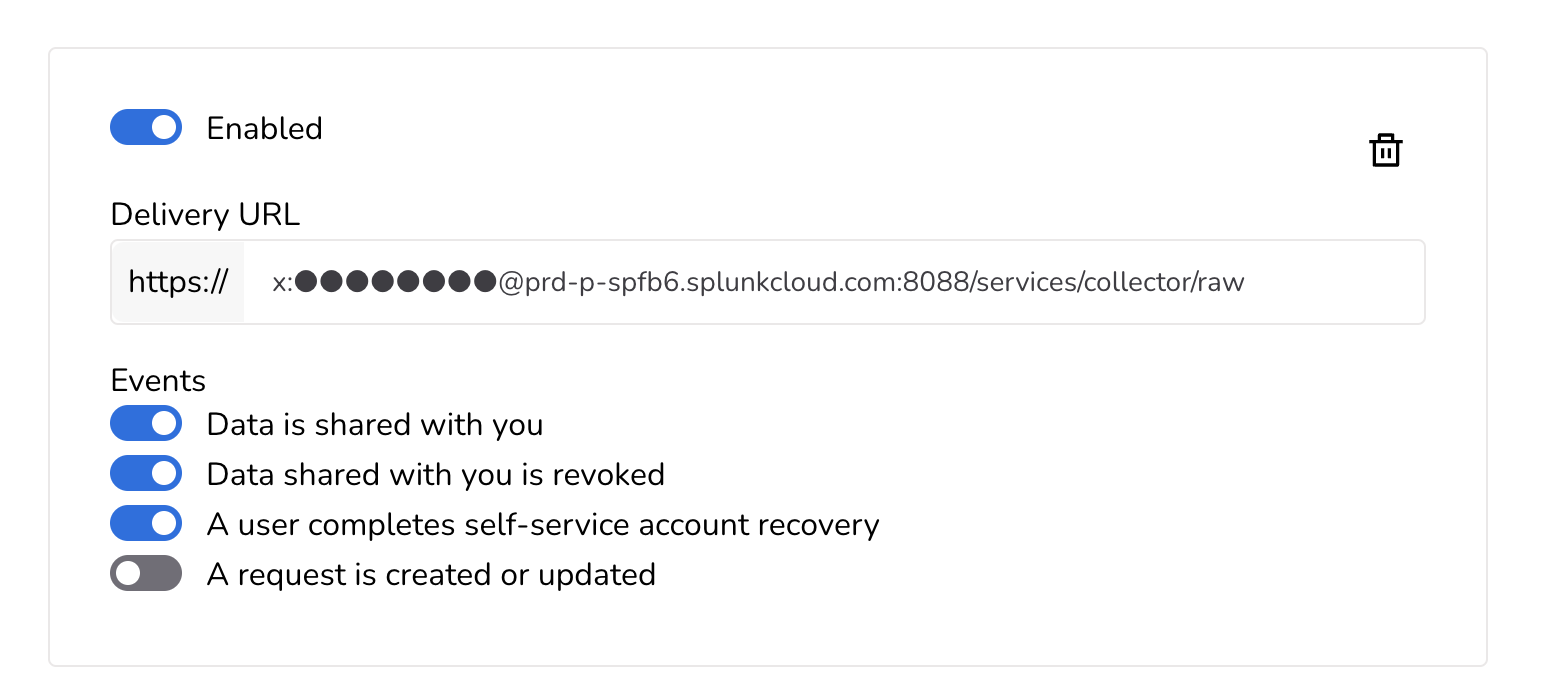
Nametag webhook configuration for Splunk Note: If you edit any part of the Delivery URL field, you must re-enter the
*HEC_TOKEN*; it not stored or available in the UI. If you do not re-enter the token, webhooks will not be received by Splunk. -
To generate a log message, go to the Verifications page in the Nametag console and press New Verification. This will cause an event to be emitted if you have A request is created or updated enabled. (For the other settings you will need to complete a verification, revoke shared data, or perform an Autopilot self-service password or MFA recovery.)
In the Splunk console you can search using the
source="nametag"parameter and you will see the JSON data.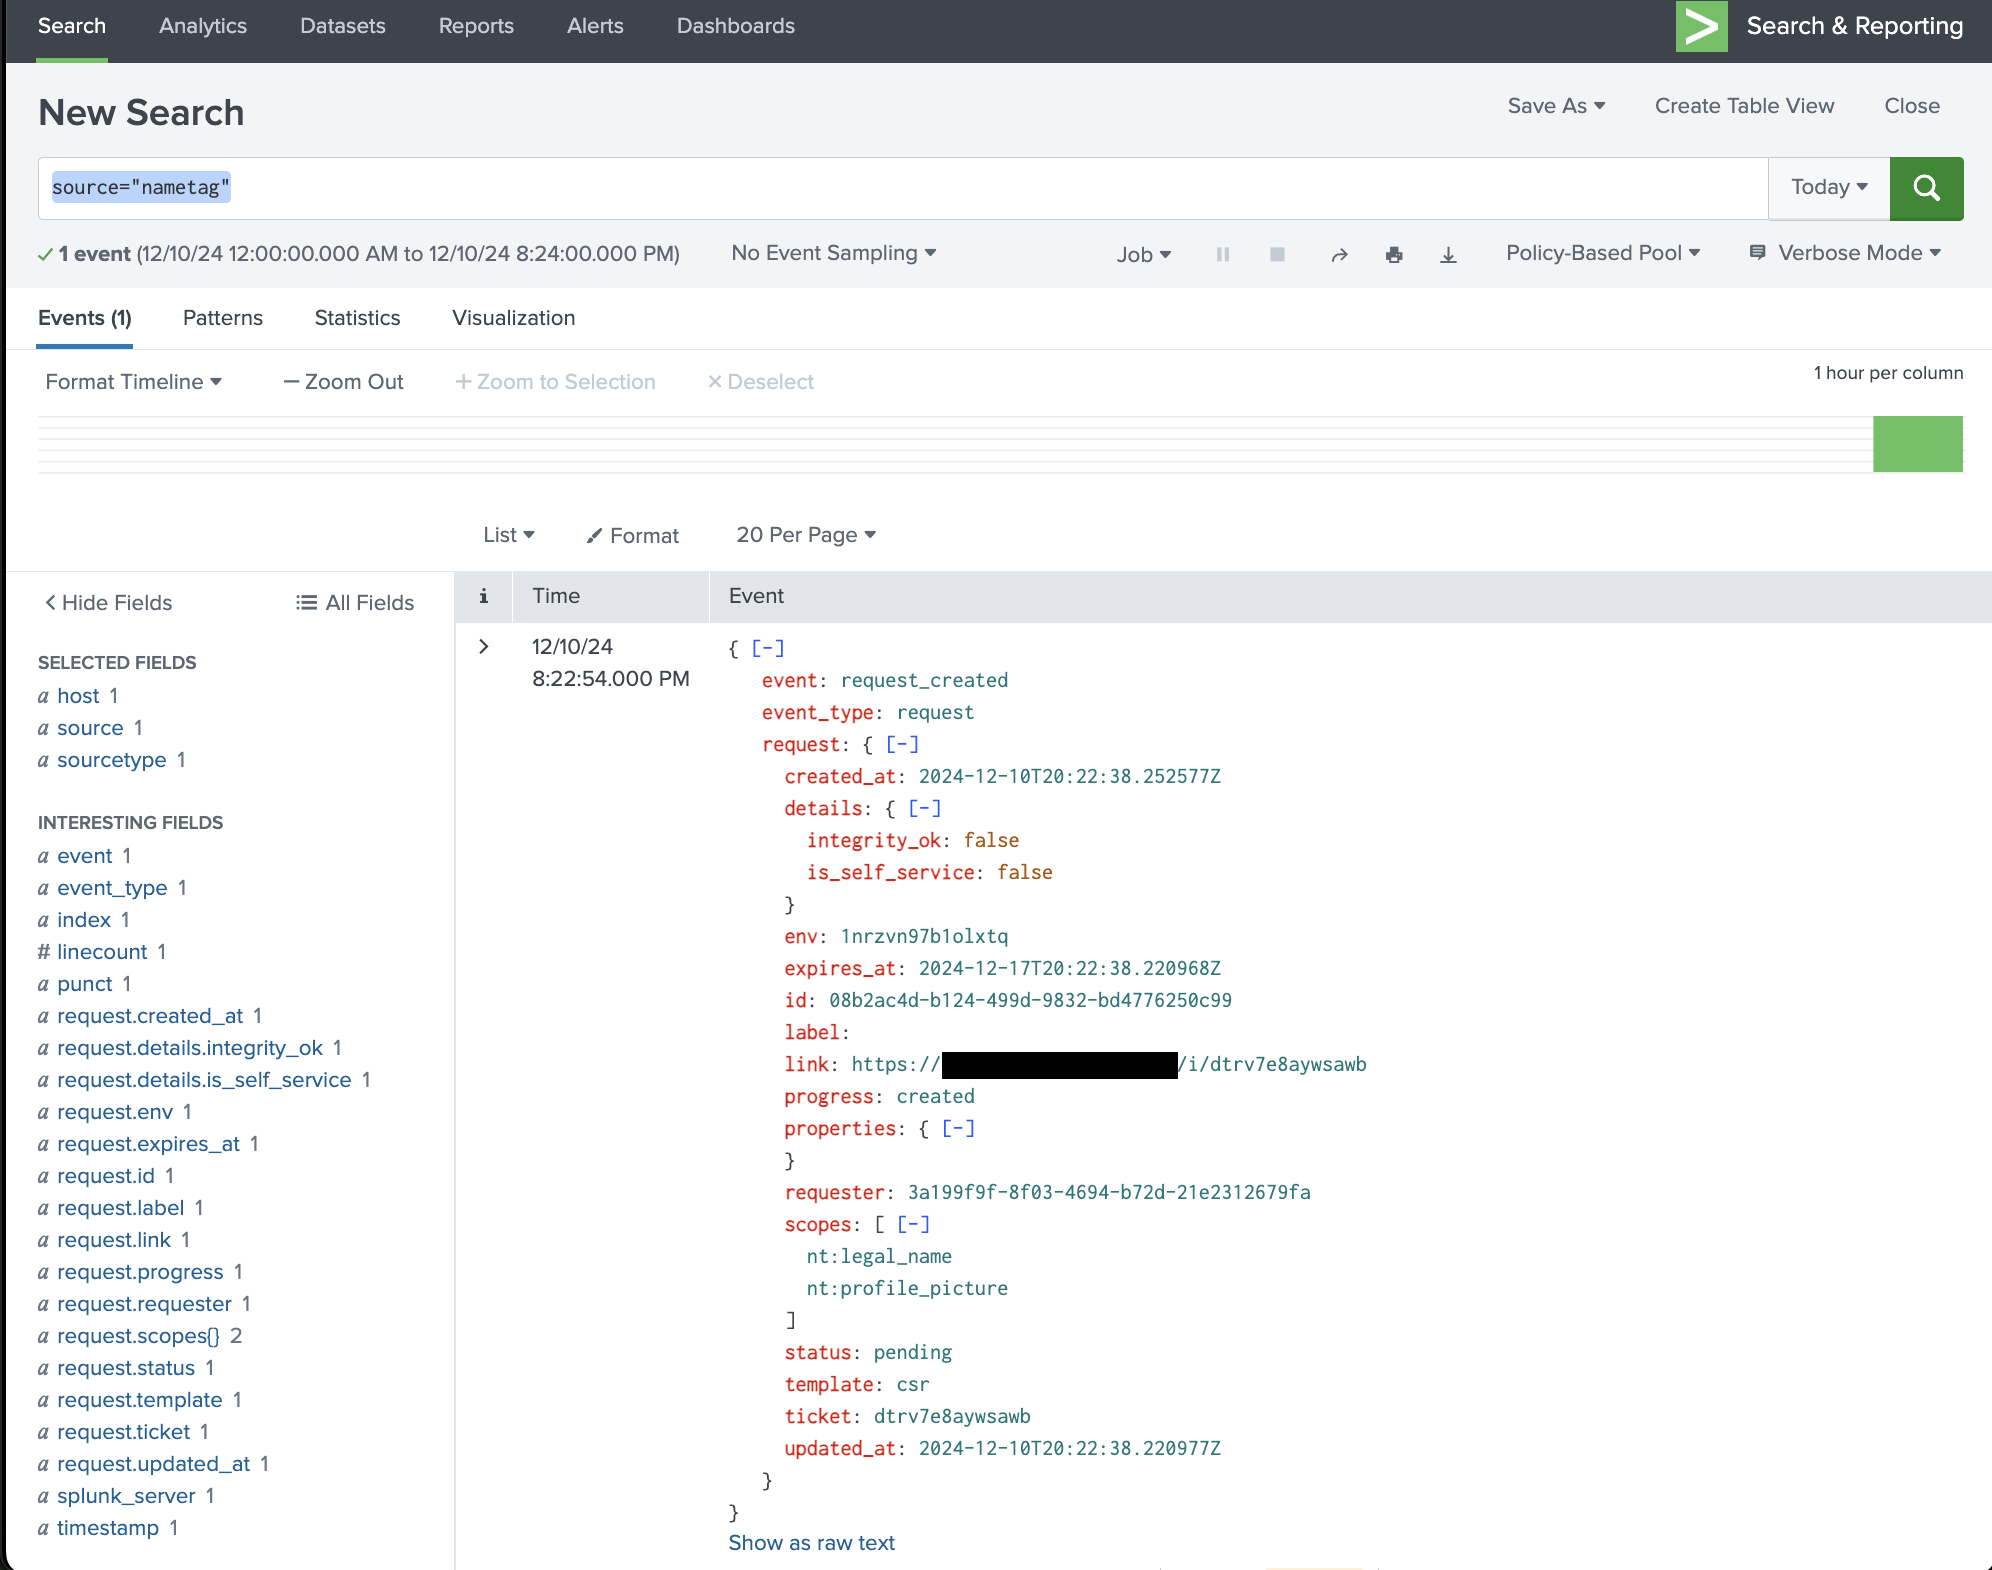
Nametag data logged in Splunk On the Nametag Configure/Webhooks page you will see a list of webhooks; successfully delivered webhooks will have a green checkmark by them; those with errors will have a red circled exclamation point.

Nametag webhook list Clicking on a webhook will show you the details of both the request and the response from Splunk
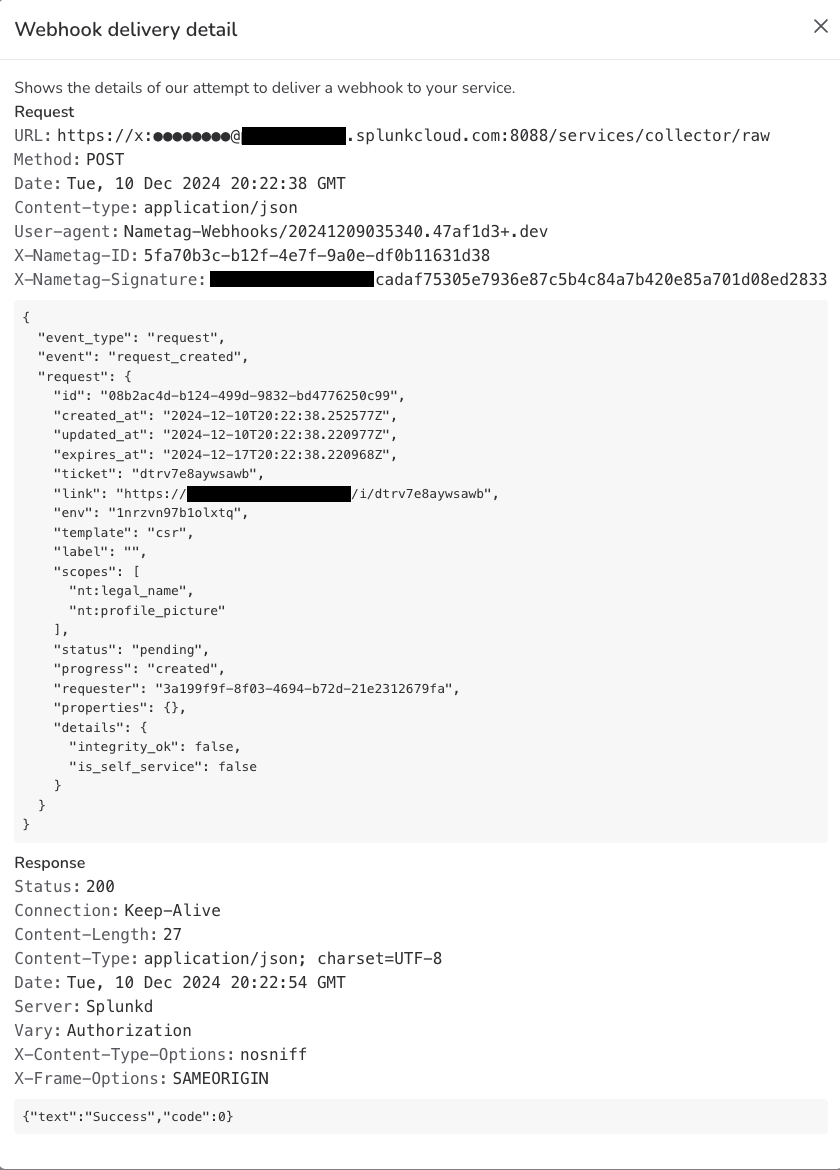
Nametag webhook details
At this point you will start seeing logs from Nametag into Splunk.