Okta API Services Integration
An alternative method of connecting Okta directories
This document describes how to configure Okta with an API Services application.
This is an alternative to the more usual integration through Okta Integration Network described here.
Set up the Okta API services application
-
In your Okta administrator dashboard, go to the Applications tab and select Add Application.
-
Choose Create App integration and choose API Services.
-
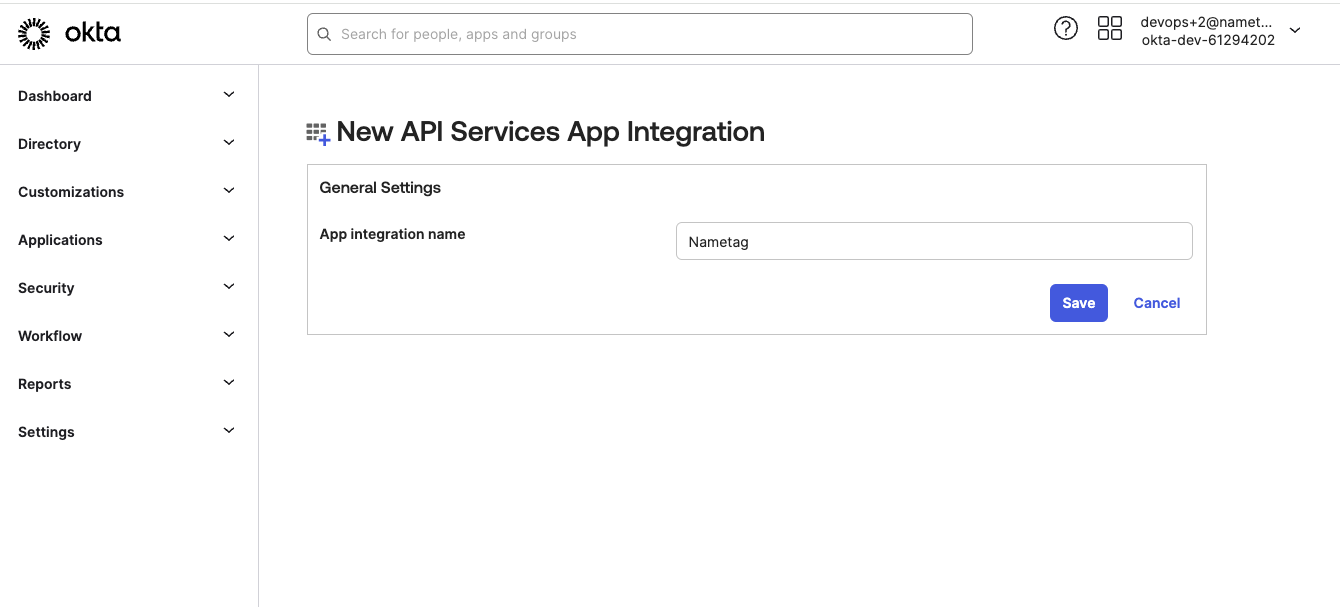
When prompted name your application Nametag (or whatever you like) and select Save.
New API service integration -
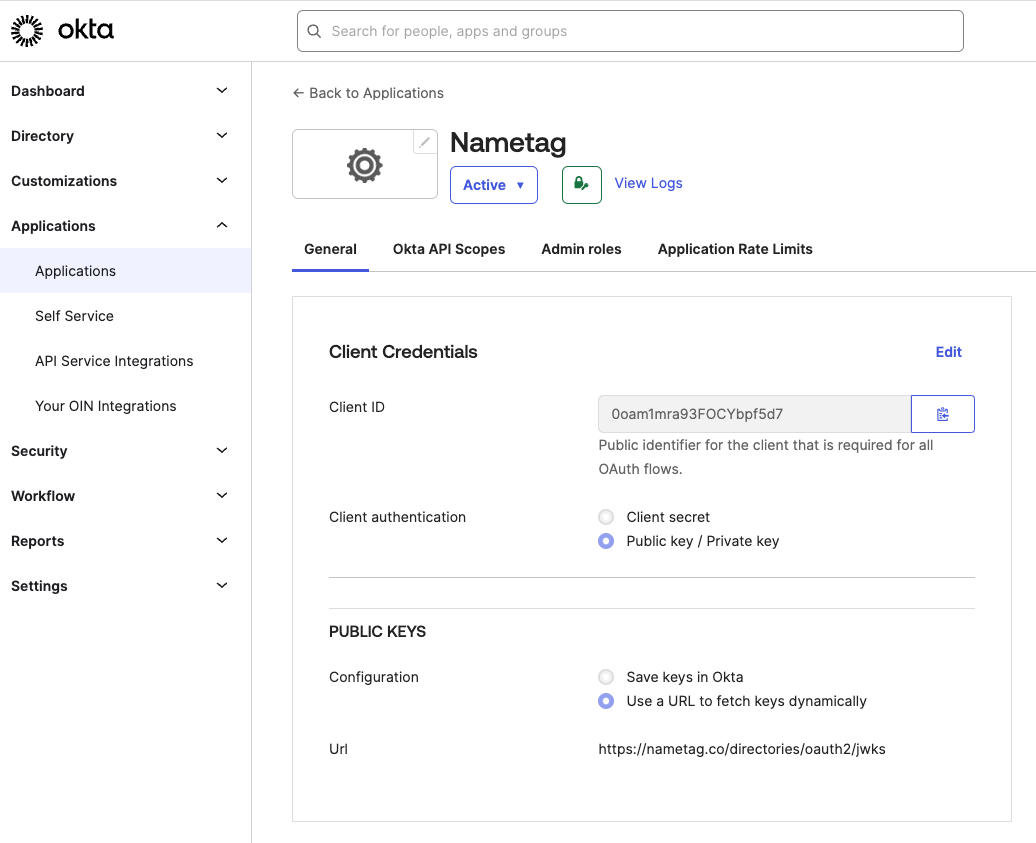
In the Client credentials section select Public key / Private key.
-
Copy the Client ID from the Client Credentials tab. You’ll need
*CLIENT_ID*later. -
In the Public keys section select Use a URL to fetch keys dynamically.
-
Enter the following URL in the URL text box:
https://nametag.co/directories/oauth2/jwks -
In the General Settings pane, clear the Require Demonstrating Proof of Possession (DPoP) header in token requests checkbox.
Create Okta resources
You will need to ensure you have an appropriate role and resource set to assign to this application.
-
For the role, Go to Security > Administrators. Select the Roles tab and select Create new role.
You can call this role
Nametagor whatever you prefer. Ensure you select the Manage user permission under the User section. Under the Group section, nestled in the Manage groups permissions you should select Manage group membership and View groups and their details.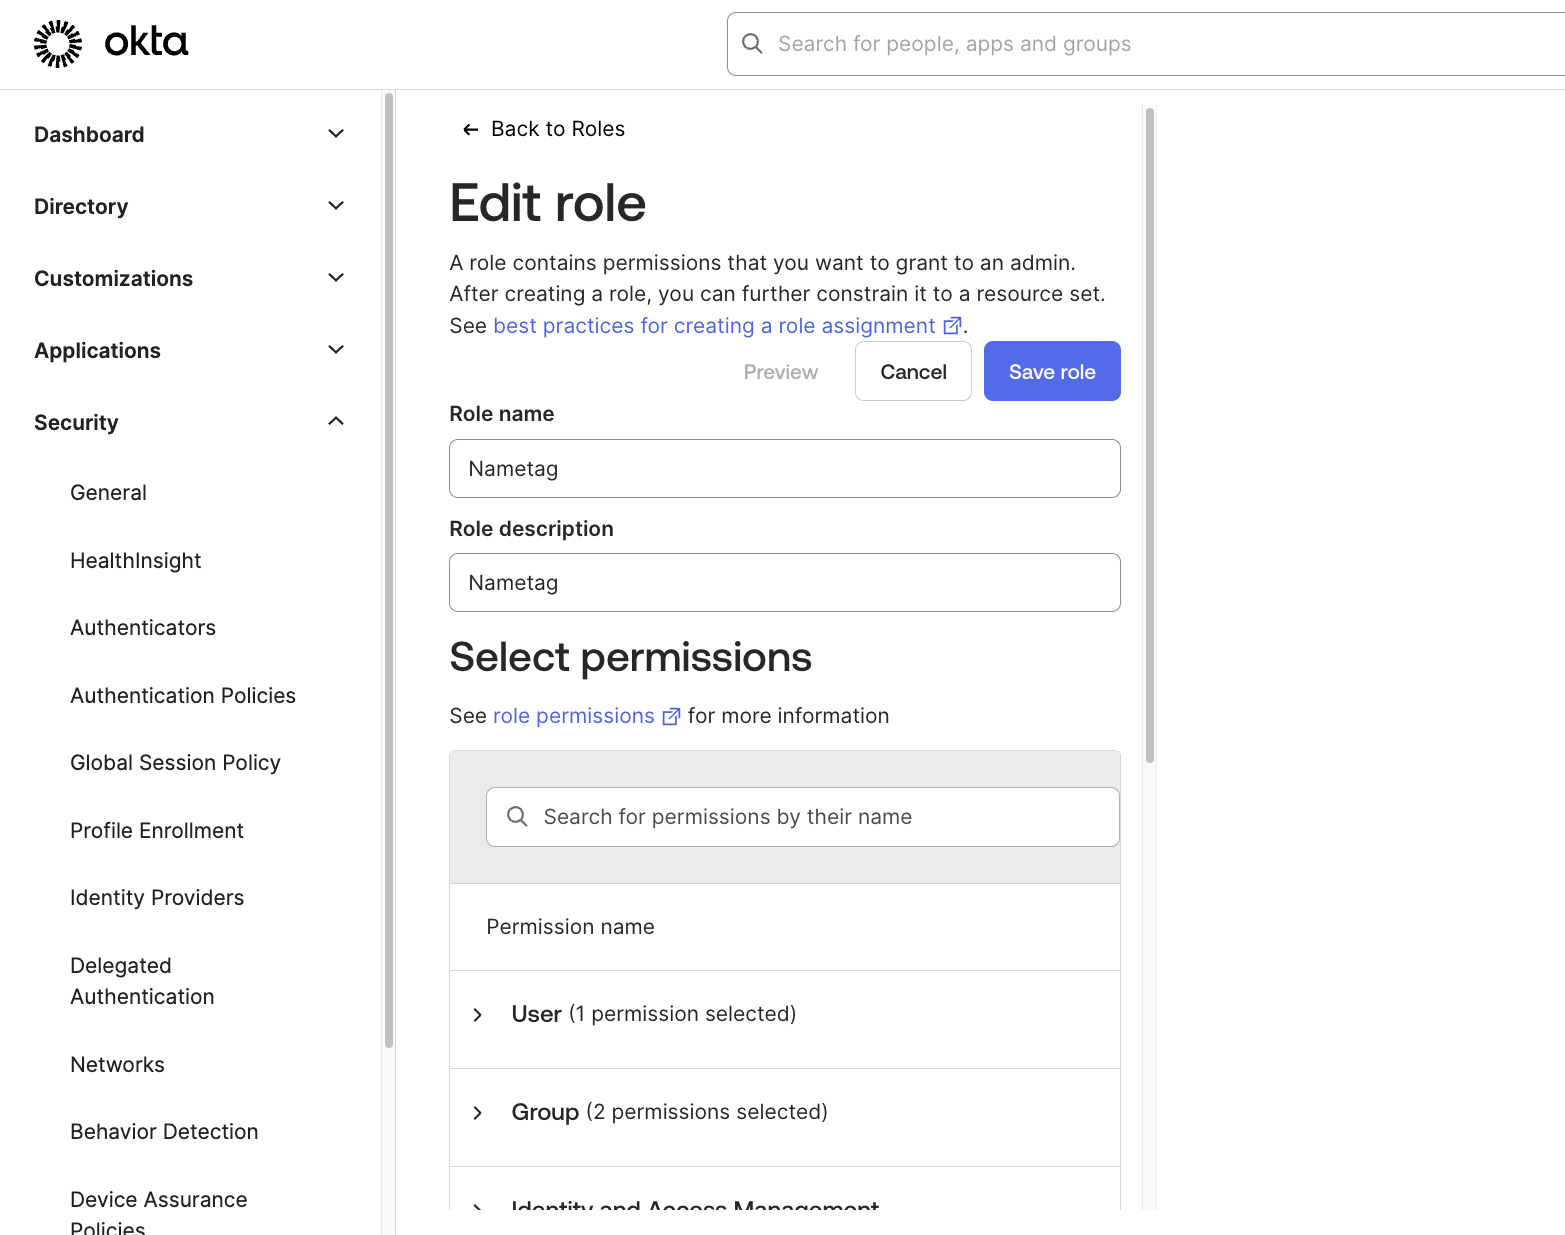
Edit role -
For the resource set, Go to Security > Administrators. Select the Resources tab and select Create new resource set.
You can call this resource set Nametag or whatever you prefer. Ensure you add the Group and User resources to it.
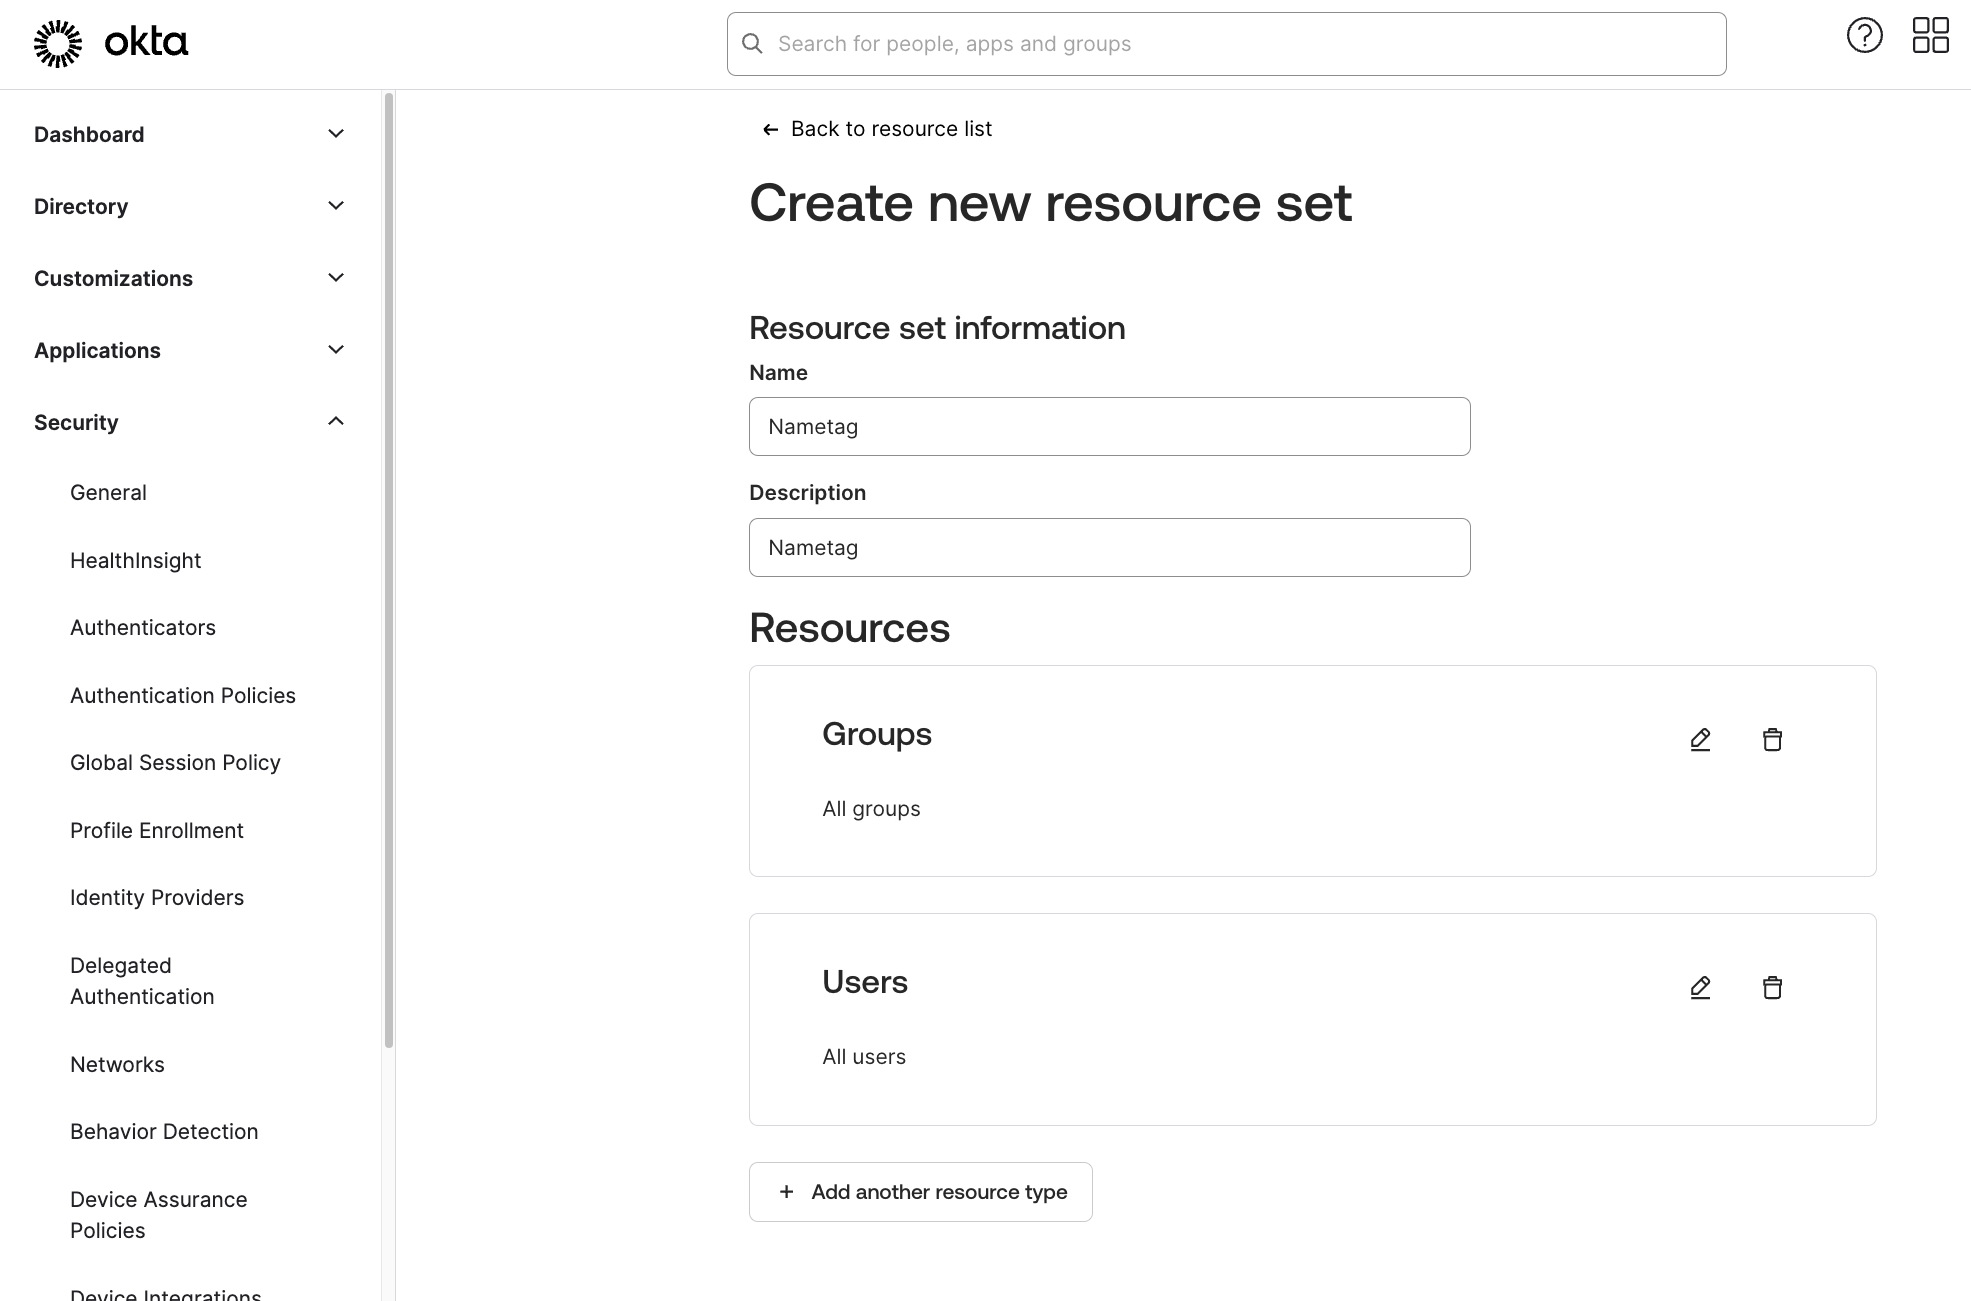
Create new resource set
Configure Okta API scopes
Back to the application you created:
-
Go to the Okta API Scopes tab.
-
Grant the following scopes:
okta.groups.read(needed to list users in your directory)okta.users.read(needed to list users in your directory)okta.users.manage(needed to reset passwords and MFA devices)

Okta scopes -
Go to the Admin Roles tab and assign the role and resource you created.
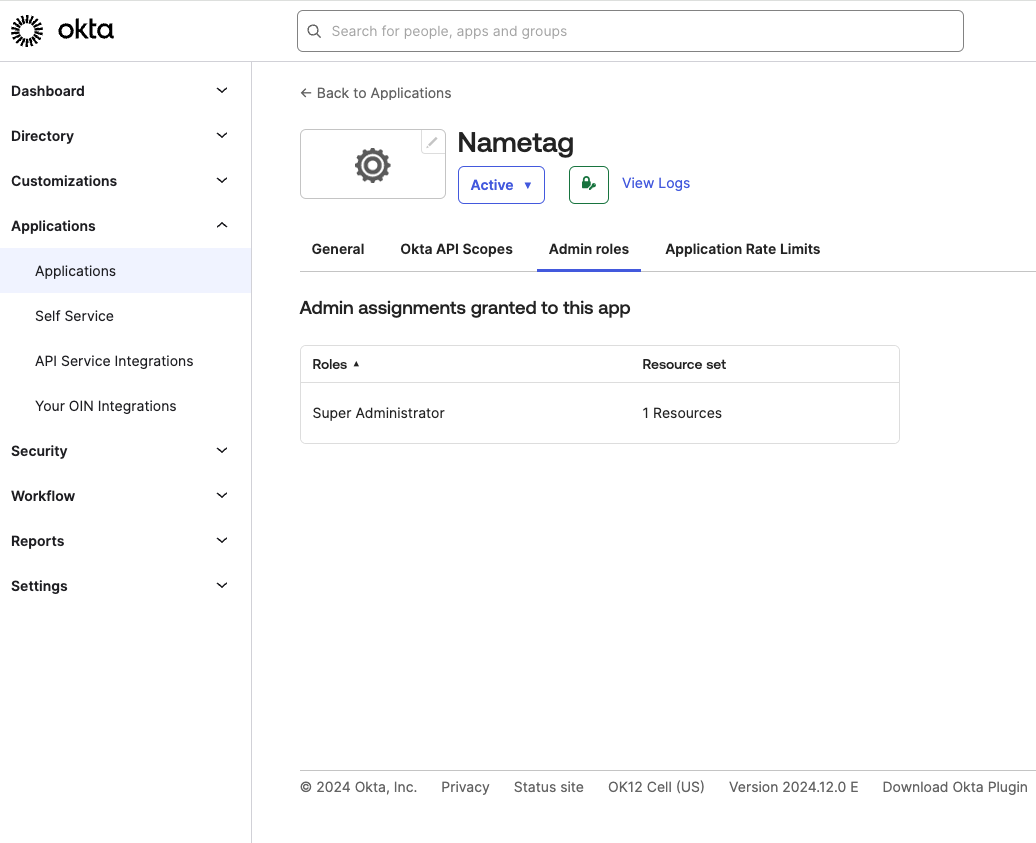
Assign role and resources
Configure Nametag
- In the Nametag console, go to Integrations and select New integration.
- Select Okta
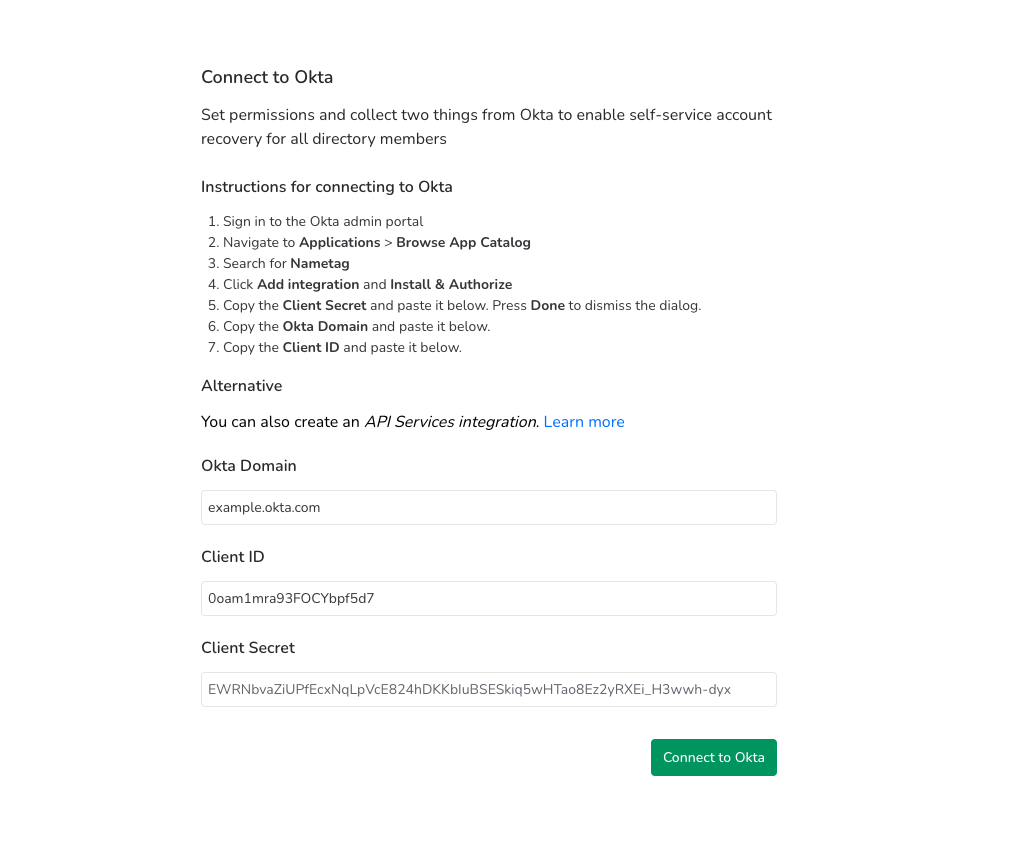
- For Okta Domain, enter your Okta domain (for example
example.okta.com) - For Client ID, enter the
*CLIENT_ID*you copied earlier. - Leave Client Secret blank.
- Select Connect to Okta.